
But before we get into that, a couple of photos from OnStage...
 |
| We sat right behind Shelli and Sterling Gardiner. Shelli is, of course, one of the founders of Stampin'Up! |
 |
| We were able to get a photo with Shelli and her daughter, Sara Douglass, current CEO of Stampin'Up! Both are really lovely ladies, very friendly and gracious. |
 |
| I finally got to meet my SU 'Mum"in person! The remarkable Kylie Bertucci. |
 |
| Kylie's Crazy Crafters |
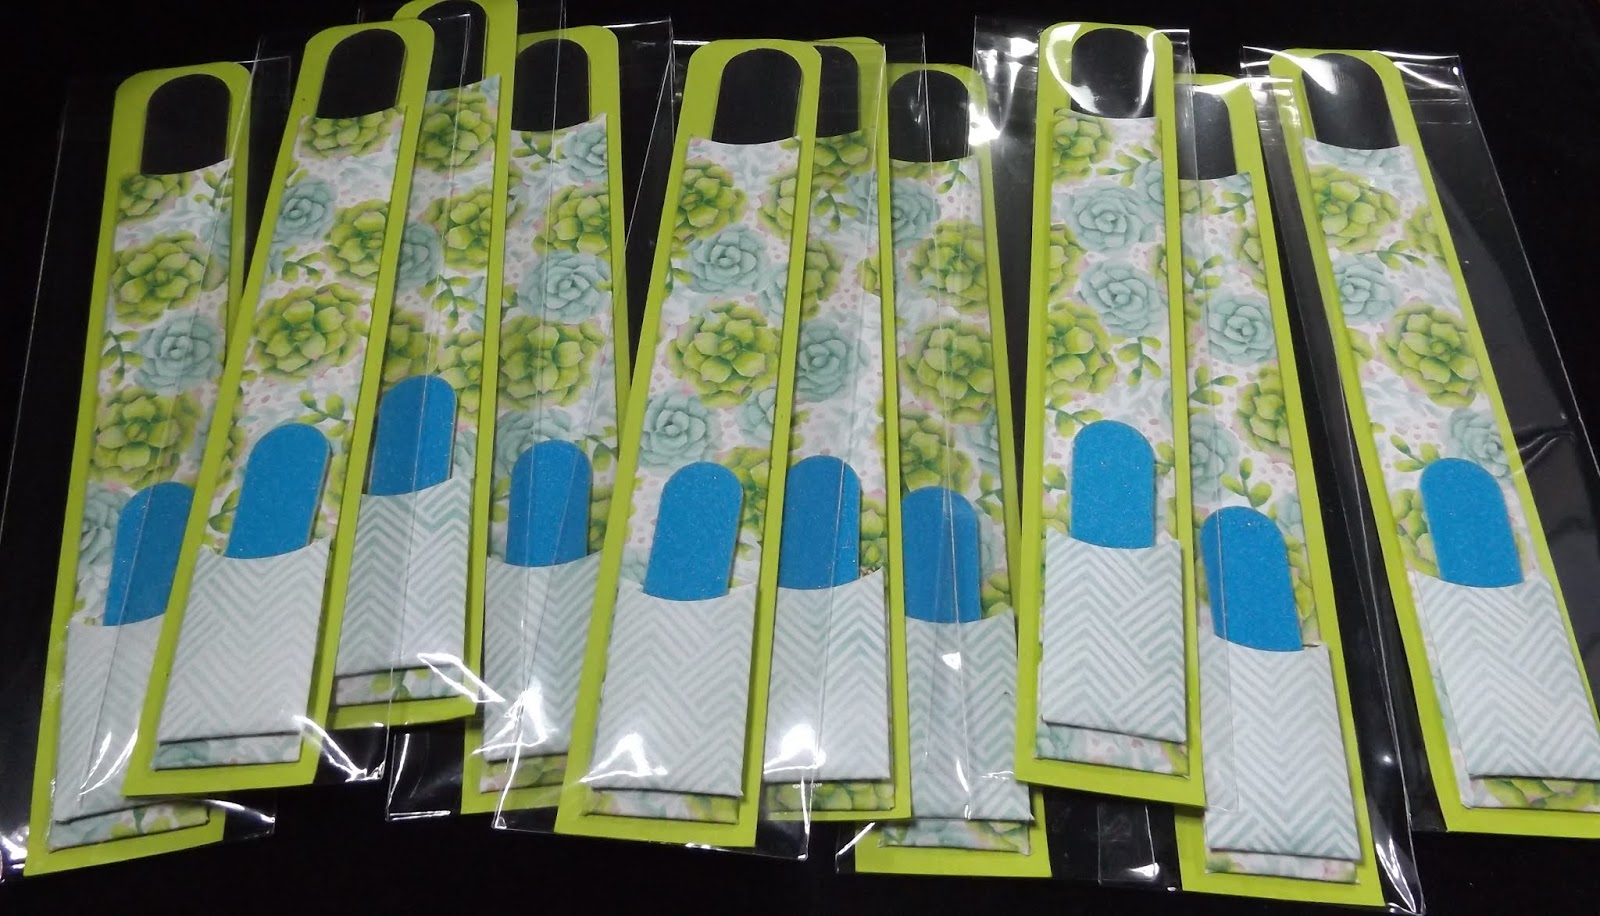
My swaps were emery board sleeves. Each sleeve holds two different sized emery boards. I bought the emery boards on eBay and was able to get a variety of colours for the smaller ones.


 |
| This is the one I have used for the instructions - the short emery board is a little longer than the ones in most of my swaps. |
Materials
·
Plain Cardstock
in a colour that matches your emery boards
·
2 pieces of Designer
Series Paper (DSP) in contrasting colours/designs
·
2 Emery boards; 1
long one and 1 short one
·
Adhesive, Multipurpose
Liquid Glue may be the best
Equipment
·
Stampin’ Trimmer
·
Bone folder
·
Paper Snips
·
Circle Punch (I
used a 1¾“ Circle Punch, but almost any circle punch will work)
·
Corner Punch
(there’s one on the Detailed Trio Punch or the Envelope Punch Board)
Instructions
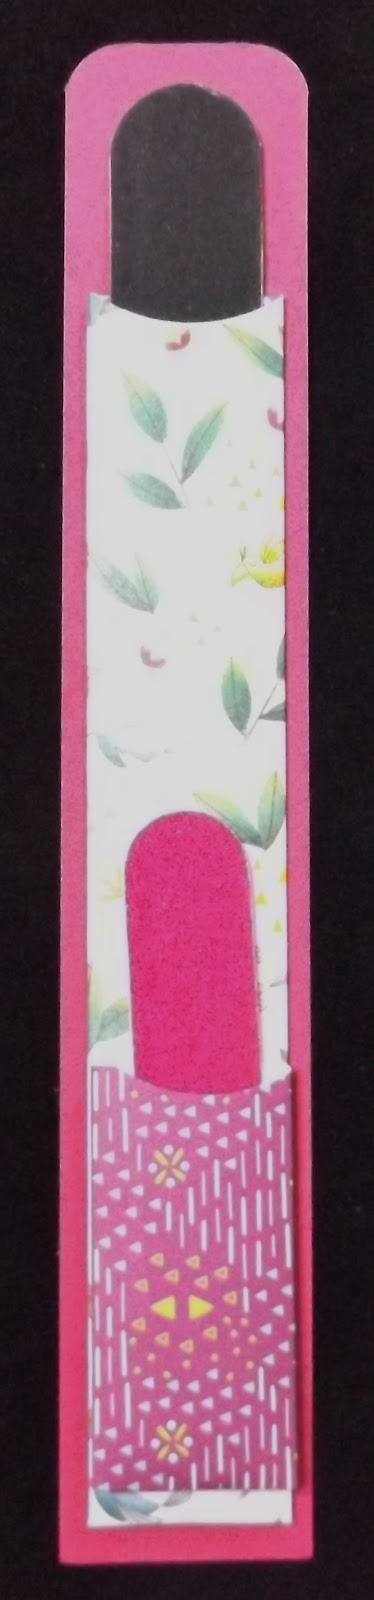
NB The emery boards that I’ve used here measure 7” x ¾” (black) and 3⅛” x ⅝” (pink). You may need to adjust the measurements
according to the size of the emery boards that you have.
1. Cut a
piece of plain cardstock 7½“ x 1¼”.
2. Use a
corner punch to round the corners at one thin end.

3. Cut a
piece of DSP 6½“ x 2¼”, then
score at ½“ on the bottom edge, ½“ on one long side and ¾” on the other long side.
4. Cut a
piece of coordinating DSP 2½” x 2¼” and
score at the same measurements as the large DSP piece.
5. Fold and
burnish all score lines.
6.
On each piece of DSP, use a circle punch and cut out an arc in the
centre of the DSP at the top.

7. Cut out
the corner pieces at the bottom of each piece of DSP. Cut on a slight angle
into the corners (see photo).

8. Glue the
sleeves:
a. Fold the
¾“ side across and glue the ½“ side on top. This leaves the wider piece inside
the sleeve with less chance of the emery board catching.
b. Fold and
glue the bottom side last, so the emery board can slide all the way to the
bottom.
9. Glue the
large sleeve to the plain cardstock (with the rounded corners at the top).
Place it about 1/8 “ from the bottom.
10. Glue the
small sleeve on top of the large sleeve, at the bottom – you can position it
flush with the large sleeve or move it up just a little as I have done in this
photo.
11. Slide the
emery boards into the sleeves.
12. You could
add embellishments or ribbon if you wish, but they may not ‘wear’ well if the
sleeve is placed into a handbag or similar.
13. I finished
mine off with a couple of stickers on the back.

Most of the ones I swapped were made with
a slightly smaller coloured emery board that measured 2¼“ x ⅝“ and I cut the small DSP 2” x 2¼“.
Thanks for visiting. Happy crafting!