Friday, 25 August 2017

SA Rural Women's Retreat

Last weekend my daughter, Kieran, and I set up a card making table for the SA Rural Women's Retreat in Woomera, SA. We were expecting 4 groups of 10 women but ended up only having 5 women join us (and 4 of those women came twice). It was a little disappointing but the women who took part really enjoyed the cards.

I had made up a set of Christmas cards featuring the Be Merry Designer Series Paper and the Cookie Cutter Builder Punch.


Stamp Set: Better Together 
Stamp Set: Cookie Cutter Christmas 
Stamp Set: Hang Your Stocking 
DSP: Be Merry 
Punch: Bell 
Punch: Starburst 
Punch: Pretty Label
Punch: Cookie Cutter Builder 


The ladies enjoyed these but asked for  some birthday cards for the second day. So Kieran and I went home that night and whipped up a batch of birthday cards for them to make on Day 2. These were very popular, especially the balloon one.


Stamp Set: Badges & Banners 
Stamp Set: Daisy Delight 
Stamp Set: Happy Birthday Gorgeous
Stamp Set: Label Me Pretty 
DSP: Birthday Memories 
DSP: Delightful Daisy 
DSP: Naturally Eclectic 
DSP: Pick a Pattern 
Punch: Balloon Bouquet 
Punch: Best Badge
Punch: Daisy 
Punch: Everyday Label 
Punch: Pretty Label
Punch: Starburst 
Embellishment: Gold Faceted Gems 

Although a bit disappointing we really enjoyed teaching the ladies some new skills. None of them had EVER made cards before but they picked it up like real champs.

Ellen Budden

Saturday, 5 August 2017

Polished Stone Technique

Our Craft Group had a play with the Polished Stone technique recently. It's a very simple technique, lots of fun to do, and can produce some stunning backgrounds.


Why don't you give it a go?

Materials

  • A4 Glossy White Cardstock - cut to size (I cut mine into quarters)
  • Isopropyl Alcohol (Rubbing Alcohol)
  • Two or three Classic Stampin' Ink Refills
  • Cotton Balls

Method


  1. Use only two or three different colours, otherwise it may look muddy.
  2. Add some IPA (isopropyl alcohol) to a cotton ball.
  3. Add a few drops of each colour to the cotton ball. The number of drops depends on how much of each colour you want. For example, you might use 1 drop of a darker colour and 3 or 4 drops of a lighter colour.
  4. Dab the cotton ball onto the cardstock. DO NOT RUB! Just dab all over, you can go over places where you've already dabbed, if you like. It doesn't really matter how much you do, just keep going until it looks OK to you. If you turn the cotton ball as you dab you will avoid duplicating the pattern over and over.
  5. Once it has dried, you can stamp directly onto the Glossy Cardstock if you like, to use it as a background, or run it through a Big Shot, or cut it into smaller pieces.

Examples

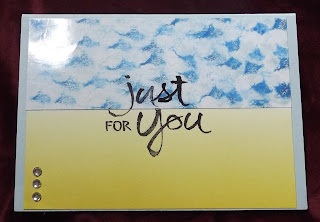
Here are some of the cards I've made using this technique. I cut a couple of the pieces in half and used them with Designer Series Paper but I think I prefer them whole as a background.

Stamp Set: Watercolor Words Photopolymer 
DSP: Color Theory 

Stamp Set: Layering Love 

Stamp Set: Label Me Pretty 
Punch: Pretty Label Punch 
DSP: Color Theory 
Punch: Starburst Punch 

Stamp Set: Lots of Love 
DSP: Color Theory 
Punch: Starburst Punch 
Punch: 1-3/4" Circle Punch 

Stamp Set: Remarkable You 
Stamp Set: Sorry For Everything 

Stamp Set: Lovely As a Tree 
Stamp Set: Happy Birthday Gorgeous 

Stamp Set: Remarkable You 

Stamp Set: Remarkable You 

Stamp Set: Lovely As a Tree 
Stamp Set: Daisy Delight 


Ellen Budden