Our craft group had a class tonight to make this Dutch Door Card.
Here are the instructions for this specific card. As usual, click on the product names to go to that item in my online store. Thanks.
MATERIALS
Bumblebee cardstock (card base)
Ice Cream Corner Designer Series Paper (small piece for card front)
Basic White cardstock (for front and inside)
Tear & Tape or Stampin' Seal
Frosted & Clear Epoxy Droplets
EQUIPMENT
Paper Trimmer
Bone Folder
Here's a Card Cling Stamp Set
Clear Block D
Memento Tuxedo Black Ink Pad
Ice Cream Cone Builder Punch
Cherry Cobbler Stampin' Blends
INSTRUCTIONS
Card Base
1. Cut Bumblebee A4 cardstock at 5-3/4" along the long side. Note that this is slightly smaller than the usual 'half of an A4' cut for a card base; this is simply to avoid having to use sixteenths of an inch in later measurements.
2. Score at 4-1/8" on the long side (i.e. half-way across the card).
3. Place the card base in the Trimmer with the score line at 90⁰ to the the cutting guide arm and with the left edge at 2-7/8" cut from the top to the score line.
4. Turn the card base so that the cut line is to the right and place the card base into the Trimmer with the score line directly under the cutting blade (the left edge will be at 4-1/8"). Cut along the score line down to the previously cut line. If necessary, use Paper Snips to get a clean cut at the corner.
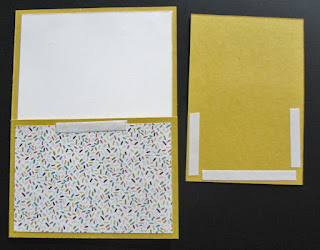
5. This will give you two pieces like this:
Inside
1. Cut a strip of the Basic White cardstock at 3-7/8" from one of the small ends. Then using that, cut a piece 5-1/2" for the inside of the card.
2. Cut another piece 2-5/8" for the front of the card (3-7/8" x 2-5/8").
3. Adhere the larger piece inside the card.
Card Front
1. Cut a piece of the Ice Cream Corner DSP 3-7/8" x 2-5/8".
2. Attach to the lower front of the card using the inside white piece as a guide.
3. Punch the ice cream cone and a scoop of ice cream from the Ice Cream Corner DSP.
4. Stamp "Happy Birthday" at the bottom of the Basic White piece cut earlier, then adhere the ice cream cone and scoop above it.
5. Add a 'cherry' on top by colouring a Clear Epoxy Droplet with a Cherry Cobbler Blend (let it dry before attaching it to your card).
6. Adhere this combination to the front of the card. Take care to only place adhesive on the bottom of the piece so as to not glue the card shut. See the photo below for suggested positioning of the adhesive. Notice the piece of adhesive on the actual card front. This is easier than trying to figure out where to place it on the smaller piece.
And that's your card, all done!
My daughter, Kieran, used some different pieces of the DSP for her cards.
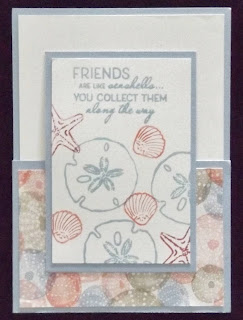
I tried some variations. You can get some quite different looks.
With this one, I used two different pieces of DSP, instead of the plain background. I'm calling this one my 'Retired Christmas Card' because I used retired DSP and a retired stamp set for this. Sorry about that! The
Label Me Lovely Punch is still available though.
I wish to thank Jessica Taylor for inspiring me with her Dutch Door Card. Please have a try, it's quite easy and just a little bit addictive!


No comments:
Post a Comment