Sunday, 4 November 2018

Christmas Decorations

We made some Christmas decorations at craft this week. We made an angel, a snowflake and a star. They were a little trickier than I initially expected, but we got there in the end and had a few good laughs along the way. All of the instructions are below, and I've given you the URLs for the original videos that inspired me. 


First we tackled the angel.


Paper Angel
(https://www.youtube.com/watch?v=V1DyuVOS4DI)


Equipment

  • Paper Trimmer 
  • Bone Folder 
  • ¾” Circle Punch 

Materials

  • Patterned paper 6” x 6” (for the angel) - it doesn't have to be Christmas paper though
  • Scrap piece of patterned paper (for the head)
  • 1” x 4” (or 2” x 2”) Thick White Cardstock
  • Coordinating ¼” Ribbon (8” long)
  • Double-sided tape adhesive
  • Multipurpose Liquid Glue (Tombow)
  • Rhinestones/pearls/other embellishments, as desired


Method

  1. Score the 6” x 6” patterned paper at ½” intervals along one side.
  2. Turn the cardstock 90° (so the score lines running across the sheet) and score at 2” and 4’ then cut 3”
  3. Fan-fold both pieces of patterned paper.
  4. Once fan-folded, bend the folded piece at 2” (this will create the wings and give you one half of the angel). Burnish the piece, if desired. Adhere one short edge (wings) to one long edge (skirt) – choose the edges that are closest to each other.
  5. Repeat with the second piece of patterned paper.
  6. Place a piece of double-sided tape along the edge of the ‘skirt’ that does not have a wing attached and place a piece of ribbon to form the hanging loop. Add an extra piece of tape over the top of the ribbon so it will stick onto the other half of the skirt. Don’t place the ribbon too close to the edges though or it will show. Do the same on the second half (with the other end of the ribbon, off-setting the positioning to minimise the bulk), add more tape and stick the two halves together.
  7. Use Thick Whisper White and punch out 4 x ¾” circles. Using Tombow, glue two together and the other two together. Punch two more circles using scrap patterned paper and glue these to each pair of circles.
  8. Using Tombow again, glue the two circles together at the top of the angel, over the ribbon (pull it tight and flatten it as much as possible). Slide it down as close to the wings as you can. Optional: add Wink of Stella on the head or the edge of the skirt and/or wings or add rhinestones/pearls or whatever you want.
EDIT: A friend later suggested using a extra piece of cardstock folded in a square to separate the two halves of the head. We had a lot of trouble getting the head to sit straight because it twists to be the same as the ribbon. 

Next, we tackled the snowflake. This one looks so good when it's finished. It's finicky the first time, but really easy.


3D Snowflake

(https://www.youtube.com/watch?v=DjbErGDRKF0)

You need to have a suitable pattern on the back of the patterned paper. The green isn't that great but the gold looks good!

These look really cool when made with vellum

Equipment

  • Paper Trimmer 
  • Small scissors
  • ⅛”Circle Punch

Materials

  • Patterned paper 6” x 6”
  • Coordinating ¼” Ribbon (6”-7” long)
  • Mini Glue Dots or Double-sided Adhesive - it works just as well as the Glue Dots but the Glue Dots are easier.

Method

  1. Cut the 6” x 6” patterned paper into 12 x ½” strips.
  2. Get two strips, fold each in half and pinch lightly to find the centre of each strip.
  3. Lay one strip vertically face down and place two glue dots along the centre fold. Place the second strip horizontally across the first one to form a +.
  4. Now place more glue dots to the horizontal strip on the outside of the centre square (the blue dots on the diagram).
  5. Lay another strip to the left and right of the vertical strip, across the top of the horizontal strip. Be sure to line up the top and bottom edges of the strips.
  6. Place more glues dots as shown in the diagram. You can add one or two; whatever you think will work best.
  7. Fold up the centre vertical piece at the bottom and place another strip across so that it will be under the centre strip and on top of the other two. Add another dot underneath the vertical piece before flattening it, to hold it in place. Do the same at the top.
  8. Lift the top horizontal strip and place a glue dot on the right side (pattern-wise) of the strip. You will have to give it a little twist to do that. Then get the left vertical strip and give it a twist and stick it to the other strip. Continue for all four corners.
  9. Repeat steps 2 to 8 with the other six strips.
  10. Place one piece on the table with the wrong side up (same as when you made the piece), then take the other piece, turn it over so it’s right side up and place it on top of the first piece. Feed each of the long strips through each of the corner parts (as made in step 8). You may find it easier to do one side and then flip it over to do the other side.
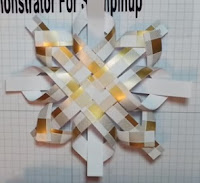
  11. Using glue dots again, adhere each strip to each corner.
  12. Trim off the excess at each corner (i.e. the long bit that is sticking through.
  13. Punch a small hole in one corner and feed the ribbon through the hole. Tie a knot at the top and it’s ready for hanging.
  14. Add some rhinestones or other embellishments to the centre and inside each corner for added sparkle.
  15. You can make a larger star by using 12” x 12” and cutting into 1” strips. This size would be suitable for the top of the tree (and therefore wouldn’t need ribbon).


Christmas Star
[I couldn’t find the original video that the screenshots are from, but it’s the same method]
(https://www.youtube.com/watch?v=6Wgdn3piXpU)


Equipment

  • Paper Trimmer
  • Small scissors


Materials
  • 2 x Patterned paper 6” x 6”
  • Coordinating ¼” Ribbon (6”-7” long)
  • Multipurpose Liquid Glue (Tombow)
  • Mini Glue Dots


Method


  1. With the right side down, fold the patterned paper in half from side to side, in both directions.
  2. Fold it again diagonally in both directions.
  3. One each centre line (not the diagonal lines), draw a line 1¼” from the edge. This mark won’t show as it’s on the wrong side of the DSP. You will have 4 lines in total. Snip along each pencil line. 
  4. Gently fold one piece into the diagonal line to make a triangle. Repeat with the piece next to it.
  5. Do the same on all four corners.
  6. In one corner, glue one of the folded pieces over the other. Repeat with all four corners.
  7. Repeat steps 1-6 with the second piece of patterned paper.
  8. To join the two sides, place two glue dots at the base of each of the points (around the hole in the middle) and then press the stars together, offsetting the points.
  9. If you wish to hang this star, take a glue dot, roll it and stick it one end of the ribbon, then do it again at the other end. Glue the ends to the top of one of the corners (place one near the top and then the other straight below it). Alternatively you can punch a small hole and thread some twine or ribbon 

We used a really stiff cardstock and I wouldn't recommend it at all! It's very hard to form good points; the cardstock kept tearing.

They are all really pretty and not too hard at all. I urge you to watch the video first and then use a printout of the instructions when you make them.

Here are some of the ones made at our craft group...

Libby and Annette displaying their goodies.
A star and angel made by a shy Amanda
Sam was pleased with her creations

Another shy crafter, Donna, made these. This was Donna's second time of making any paper crafts ever!

I hope you enjoy making these. They'd be suitable to make with your kids or grandkids, too.

Happy crafting!


Wednesday, 29 August 2018

Colouring With Stampin' Blends


We had a play with the Stampin' Blends at our Craft Group this week. It was a very relaxing evening.
Here are the notes that I handed out to my ladies, plus some photos of images that I coloured (some not very well).


About Stampin' Blends

  • Stampin’ Blends are alcohol based markers. Always use a water-based ink, such as Memento, to stamp the image without having any bleeding.
  • Stampin’ Blends come in a variety of colours, each with a dark and light marker. You can use either one to simply colour your image as you would with any other marker, but the magic happens when you use both shades and blend them together.
  • There are currently 21 colours with another 6 coming in the Holiday Catalogue, plus the Ivory and Bronze for skin tones, and the Colour Lifter.
  • Each marker has two ends; a fine tip end and a brush end. These can be identified by the thin or thick line at each end.
  • The lids can be placed on the other end of the marker whilst you’re using it (so you don’t lose it). When you’ve finished with a Blend Marker, replace the lid straight away. Make sure the cap ‘snaps’ on so that it doesn’t dry out.
  • You can use the dark colour first and then blend with the light colour, or you can do it the other way around as well. It probably depends on what image you are using and how you want it to look.
  • The colours blend better when they’re wet, so do really large images in sections. You can always go over them again if they’ve dried out but you will end up with a more saturated colour.
  • You can use different colours together, e.g. use an orange at the bottom and shade it up to a yellow at the top. Experiment to find the combinations that you like.
  • The Stampin’ Blends Colour Lifter can be used to remove small marks when you’ve accidently gone outside of the lines, but it may leave some colour so try not to do that.
  • You can use the Blends to colour embellishments so that you can get the perfect colour for your card. You can colour Rhinestones, Clear Faceted Gems, Pearls or even any white ribbon!
  • You can draw on Window Sheets with Blends, or colour vellum (on the back or the front of the vellum, depending on the look that you want).
  • You can use a Clear Wink of Stella Glitter Brush on top of the coloured image to give it some overall glitz or just to highlight certain areas.
  • Stampin’ Blends should be stored horizontally for the best outcome. 
  • There are many different methods for using the Blends. Do a YouTube search for “Stampin’ Blends” and watch some videos. Each person seems to do it differently, so just experiment and see what works for you.

Materials

  • Whisper White, Shimmery White, or any light coloured cardstock - cut to size
  • Grid Paper to use beneath your cardstock

Equipment

  • Paper Trimmer
  • Stampin’ Blends in your choice of colours
  • Stampin’ Blends Colour Lifter
  • Memento Ink Pad (Tuxedo Black)
  • Outline stamp suitable for colouring (See suggestions at the end)

Method

  • Stamp the image onto the cardstock and make sure it is completely dry before you start colouring.
  • Be sure to place some Grid Paper or scrap paper under your cardstock when you are colouring. These markers can really saturate the cardstock and may bleed through.
  • When using the dark colour to highlight lines on the stamped images, use the fine point end and simply draw over the lines and then use small circular motions or ‘flicking’ strokes around the inside of the outline. Don't press hard on the brush though, or you will ruin the shape.
  • Use the brush end (or the fine tip end on a smaller image) of the lighter shade to fill in the centre and blend the dark into the light. Circular motions are best for this.
  • As you colour you will see a streaky sort of effect, as you do with any other kind of marker. These streaks will disappear as the alcohol dries. It’s magic!
  • The colours will lighten as they dry (give them a minute or two). You can then add more colour if you want.
  • For even more dimension, use the Colour Lifter to create an even lighter highlight on your image.

Examples

I started simply colouring in these images from the Painted Glass Stamp Set. Don't look too closely though because I missed a lot of spots. I think I need better glasses for these, lol.


I coloured some butterfly wings  from the Beautiful Day Stamp Set. I only had half-butterflies available because the stamp was bigger than the one block that I had with me at the time.


I used the dark Pumpkin Pie on the outer edges with the lighter shading on this flower (also from the Beautiful Day Stamp Set) 
 
This was the first one I did and I obviously need more practice with the blending 

I tried the same method again later with much better results.

Definitely better at the blending on this one

I experimented by using a dark Pineapple Punch in the centre of each petal and then blending it with the light all around the rest of the petal. It looks alright.


I got adventurous and used the dark and light Pumpkin Pie AND light Daffodil Delight. I like how this turned out.


I tried the same method with Highland Heather and Light Daffodil Delight but the yellow turned the purple a maroon colour. But it doesn't look too bad, I guess, and some flashes of the purple still show through.


I finished off by just doodling on some smaller images from the In Every Season Stamp Set and trying different colours.


Thanks for reading and happy crafting!


Friday, 17 August 2018

TARDIS Card


My daughter's fiance, Aidan, turned 30 a few days ago. He's a massive Doctor Who fan, so I'd been thinking of making a TARDIS card for a couple of years but never quite got around to it. But seeing as this one was a major birthday I decided to make the effort (and I remembered early enough to work on the design).

The front of the card has a TARDIS picture printed onto white cardstock and then fussy cut.


I simply Googled "TARDIS" and chose one that suited my purpose.I had to adjust the size before printing so it would fit nicely onto a 4" x 6" card base (I used black cardstock). I used my paper trimmer to cut along the lines so that the doors would open to reveal the Doctor with a birthday message specifically for Aidan.


I wanted to incorporate Aidan's favourite Doctor, so I posted an innocent question on Facebook asking people to say who is their favourite, knowing full well that Aidan would probably respond (and he was the first to do so). His choice is Matt Smith, so I did some more Googling to find an appropriate photo of Matt Smith and the correct internal photo of the TARDIS (it changes sometimes). I settled on this one of Matt.


I then used Paint to add a text box so that it looks like the Doctor is holding the birthday banner.

I even downloaded a Doctor Who font for the writing!

This was sized to fit inside the open doors. I had a little wrinkle (literally) with it though. I glued the Doctor onto the doors before attaching the TARDIS to the card base. But the A and Y of birthday got caught under the door a bit so I used a Journaling Pen to join the A and Y to look like just an A and then add another Y at the end. If you didn't know about it, you probably wouldn't notice but, of course, I knew about it, haha.

Once I had the front put together, I worked on the inside. I decided that I wanted it to be "bigger on the inside", just like the TARDIS! So I chose a photo, made it nice and big to print out on plain copy paper.

It started out about an A4 size

Then I used the Turkish Map Fold technique to make it fit. I think the result is just perfect because when you open the card, the inside opens up to be bigger than the card!


I added a label at the bottom so I could write on the card.

The trickiest bit of making this card was using the Turkish Map Fold on a rectangular piece of paper (you usually use a 12" x 12" sheet of paper). Thankfully I found some instructions online and was able to do it without too much effort. These are the instructions I followed: "Turkish Map Fold with a Rectangular Sheet", obviously I had to orient it to suit my card that open from the bottom up.

I have made other Explosion Cards using the Turkish Map Fold, but I will probably never make another one like this and I'm so glad I did it. Aidan was very happy with it.

Until next time, happy crafting!


Saturday, 14 July 2018

Impossible Card

Share What You Love Specialty DSP
Painted Glass Stamp Set

Hi folks. Sorry I've been so absent, but life has been a little hectic of late.

Anyway, I have been seeing lots of photos of a card called the Impossible Card, most of them are similar to this one made by the indomitable Dawn Griffith.

Photo used with permission of Dawn Griffith

Mainly these are a single sheet of cardstock with patterned paper added to the panels and a strip of cardstock glued across the front for stability. I loved the look of them but thought they might be rather flimsy, so I decided to make them as a card front and them glue them onto a card base. Also, because I'm somewhat lazy by nature, I decided to use a thicker patterned paper so that I didn't need to cut out strange shapes to glue to the cardstock of the Impossible Card. And this is what I came up with (at the top of the page, and this one).

Broadway Bound Specialty DSP
Perennial Birthday Stamp Set

They are super easy to make, so have a go.

Materials

  • Plain A4 cardstock (card base and label)
  • 4" x 6" piece of stiff, double-sided patterned paper. If you don't have a stiff DSP, see the alternate instructions at the end.

Equipment

  • Paper Trimmer
  • Bone Folder
  • Adhesive
  • A label punch
  • Sentiment Stamp to fit on your label
  • Ink pad in chosen colour
  • Embellishments as desired

Instructions

  1. Cut the A4 cardstock 8" x 6", score at 4" on the long side and fold to form the card base.
  2. Stamp the desired sentiment onto some of the leftover cardstock and use your chosen label punch to punch it out.
  3. Take the patterned paper and cut it 5¾" x 3¾". Fold it half longways and open it out again. On one half, cut at 2⅞" from the fold to the edge. On the opposite side cut twice at 1¼" from each end from the centre fold to the edge, as shown below.
  4. Be aware that if you have a pattern that needs to go in a certain direction you will have to choose which side gets which cuts.  
  5. Twist the piece so that you have the following shape with a piece that sits up in the middle.
  6. Attach this piece to the card base. The piece can be twisted in either direction so that the gap can be on the left or the right. 
  7. Attached the label to the popped-up piece.
  8. Embellish as desired.
  9. This card will fold flat for posting.

Alternate Instructions

  1. If you do not have a stiff patterned paper, you can use plain cardstock and then cut out pieces of patterned paper to adhere as appropriate.
  2. Cut patterned paper 3¾" x 2⅞" and then cut out a piece 1⅞" x 1⅝" to get the desired shape. You will need two of these pieces.
    Again, if you are using a patterned paper that has an 'up', you may need to cut out a different corner of the patterned paper so that the pattern is correct.
  3. Adhere the panels as appropriate on the card front.
  4. You can cut out a piece of patterned paper for the popped-up piece, if you want, although the label will cover most of this. The popped-up piece measures 3-3/16" x 1⅞"
Easy peasy, right?

Happy crafting.

Thursday, 5 April 2018

Colourful Cards

I hope you all had a lovely Easter. We had two of our four offspring come to visit (plus the one who lives in the same town as us already), so had lots of family including three grandchildren.

A couple of weeks ago I saw some cute cards made by Kirsten Aitchison and thought I'd have a go. These aren't a fancy fold, just a different use of patterned paper. These are what I came up with.


Each card uses a strip of patterned paper with a mat of white cardstock, then a label or two with a stamped image and/or a sentiment. I was very happy with the look of them. Using coloured cardstock for the card base and coordinated patterned paper as the highlight piece makes them nice and bright. Here are a few close-ups.


For some I used Tuxedo Black Memento Ink for the stamping and my Stampin' Blends for colouring, for others I used Basic Black Archival Stampin’ Pad and Stampin' Write Markers. I used the fabulous Stitched Shapes Framelits Dies for the large labels. This die set has four different sizes each of squares, ovals and circles, each with a stitch pattern around the outer edge. I love the look of them.

Anyway, that's it, short and sweet. Happy Crafting!


Sunday, 11 March 2018

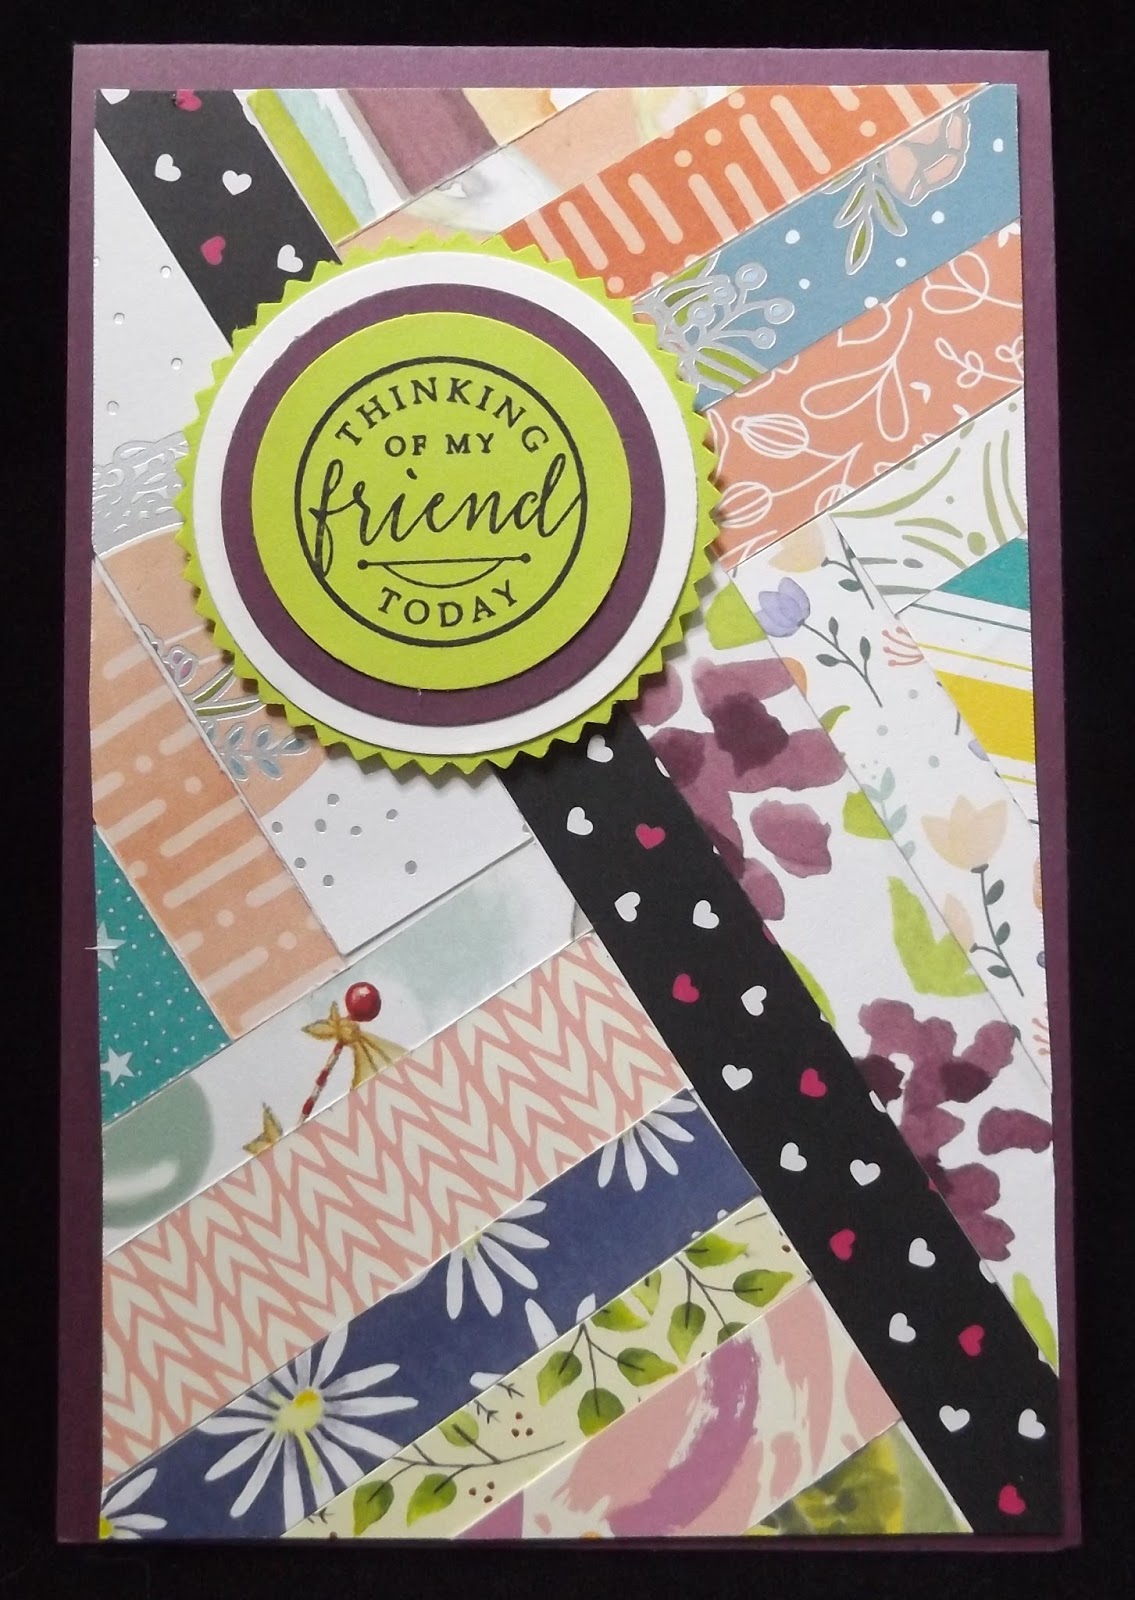
Herringbone Technique

Last year I had to put together 40+ card kits for a local gathering of women from around the state (South Australia, that is). I cut the patterned paper to the required size and was left with a bunch of strips around 1/2" wide. I stuck the strips into a bag and later did some searching on YouTube and found a great way to use them. I have since discovered that the technique is called the Herringbone Technique, which makes sense when you look at the finished product.

I made a few cards with my scraps from last year and now I keep all of those scrappy strips whenever I make any cards. I decided to use some recently to make some more cards.


To make them, I cut a piece of scrap cardboard to size. I use the cardboard that comes in a pack of patterned paper, but any cardboard will do - you won't see it once the card is finished. I then cut a piece of Multipurpose Adhesive Sheets to size and place it onto the backing piece. My cards usually measure 6" x 4" so I cut the backing piece 5.75" x 3.75", but you can choose any dimensions. Then you just lay the strips as you like. Most of my strips are around half an inch wide but they can be wider or narrower, it doesn't really matter. I usually start with one long strip diagonally across the middle, then change directions as the whim takes me. I try to coordinate the colours but sometimes it gets away on me. I even use strips of plain cardstock sometimes.

Using coordinating colours looks pretty good...

But a mish-mash of colours can look good, too.
Once the whole backing piece is covered, flip it over and trim the excess patterned paper around the edges. Your scissors will get quite sticky but an alcohol wipe will fix that, You can do this technique using regular liquid glue but I prefer the Sheet Adhesive so I don't have to worry about it drying out as I'm working.

Once you've trimmed the DSP, adhere your masterpiece to your card base, stamp and punch out a label or two and there you have it! I often use the Starburst Punch and the 1.75" Circle Punch although I sometimes use a variety of sizes of the circles. But you don't have to only use circles, experiment!

I used FOUR circles on this one!

Another little tweak is to cut your backing piece slightly smaller (say a quarter of an inch, length and width) and use a piece of contrasting plain cardstock to provide a bit of a border.


Adding a mat of contrasting cardstock can make a difference.

This technique can be a little time-consuming to make but they do look good and you will feel good because you've used some of those little scraps that you just cannot bear to throw away. Plus it's quite good fun and somewhat therapeutic. Enjoy!