Monday, 24 June 2019

Origami Photo Frame

Last week we made some Origami Photo Frames. These look tricky at first, but are really easy and addictive!


Materials

·       4 sheets of 6” x 6” patterned paper
·       White Cardstock
·       Multipurpose Liquid Glue

Equipment

·       Paper Trimmer
·       Bone Folder

Instructions

To make this frame, you fold four pieces of 6” x 6” patterned paper and then glue the pieces together. The opening for the photo is around 3¼" square. You can use all the same patterned paper, or all different or any combination. Note, though, that BOTH sides of each sheet will be visible in the finished item, so choose patterned paper that has complimentary colouring/designs on the back. Also, if the images are directional (i.e. should go in one direction, e.g. trees) then make sure that it will look OK with some being sideways and upside down.

1.      Take one piece of patterned paper, place it so that the corner colour is face up (so it will be on the inside when you fold the paper), then fold opposite corners together to form a large triangle. Burnish with a Bone Folder

TIP: To get a perfect triangle: match the two corners together, press on the fold in the middle with your finger then use a Bone Folder to crease to the points.


2.      Open the patterned paper and take the right corner and fold it to the middle score line. Burnish the fold. If the paper is stiff and you can’t get that point pointy, you can ‘work’ it until it’s more pliable. It won’t be seen anyway.


3.      Turn the piece over and fold the corner piece up so that the centre score lines match up.


4.      Turn it over again and fold the right side into the centre (as in step 2).


5.      Then fold the left side over that piece and tuck the corner under the folded piece.


NOTE: It doesn’t really matter if the edges don’t all meet perfectly as you place that side at the back. In the photo above, the bottom corner isn’t even but it will be covered by another piece.

6.      Repeat with the other three pieces of patterned paper.

7.      Apply some Multipurpose Liquid Glue to the pointy end on the back (1” to 1½“) and slide it into the front of the corner of another piece. Line up the pieces so that the edge is straight. Repeat with all pieces.


8.      Cut White Cardstock 5¾“ x 5¾“ and tuck the corners into the frame corners on the back of the frame. This is not glued down. Any photo placed in the frame can be attached to this sheet with a bit of double-sided adhesive to keep it in place. You could add a piece of clear acetate as well, to protect the photo.


9.      Glue a piece of ribbon at the top inside the fold of the frame, or glue a couple of pieces of magnetic strip on the top corners on the back (of course).


10.  You can add a label and sentiment to the front, if desired.


This is made using a single sheet of 12" x 12" patterned paper

This uses two different pieces of patterned paper, positioned on opposite sides

This uses four different pieces of patterned paper

The ladies in the Craft Group made theirs using a single sheet of patterned paper (we have four Librans in our group and making decisions on things like patterned paper can take a while :) )

Heather made one for her cat

Amanda's is starry but she hasn't added a sentiment yet

Kieran made a couple of frames for Santa photos later in the year. This is the first one.

And this is Kieran's second one.

The frames are very quick to put together and there are so many different looks you can get with different patterned paper. Have a go.

Happy crafting.

Monday, 17 June 2019

Adhesives Holders


Last week I showed my group how to make some holders for their adhesives.

It all came about because at OnStage one of the swaps I received was a Tombow (Multipurpose Liquid Glue) Holder made by Lyn Verity, thank you, Lyn.


I found this to be very useful, and then I saw a different one on Facebook and thought it would be good as well.


So, I put together instruction sheets and we set off to make them.


Tombow Glue Holder


Materials

- A4 Cardstock
- 2” x 5” Patterned paper
- 6” x ½” Ribbon (for tag; optional)

Equipment

- Paper Trimmer
- Paper Snips
- Bone folder
- Multipurpose Liquid Glue
- 1¼“ Circle Punch
- Tag Topper Punch (for the tag; optional)

Instructions


This is made in two pieces: a box and a tag. The tag is optional, however. It will work just as well with only the box.


The Box


1. Cut cardstock 7½” x 5”.

2. Score on short edge at 1½” from each side (leaving a 2” wide piece in the middle).

3. Score on long edge at ½”, 2” 4” and 5½”.

4. Starting at the 2” score line, cut at 1” from each side (red lines in diagram) and then trim (with Paper Snips) across the top score line from the outside edge to the cut line on the 2” score line.

TIP: You may find it easier if you fold along that 2” score line before cutting.


5. Fold and burnish on all score lines.

6. Cut on each score line to body (red lines above) including the bottom tab.


7. Punch a circle in the 2” x 1½” piece at the bottom, as shown in the diagram.

8. Fold box and glue ½” tabs together (just a dab of glue at the corners that touch), then glue the large tabs down.

9. Cut patterned paper 4⅞” x 1⅞”. Score at 1 7/16” from each end. Glue to front and sides of box. If you are not using a tag (see below) and want patterned paper around the whole box, then cut 7½” x 1⅞” and score at 2”, 3 ½”, 5½” and 7”. Starting at the back, wrap the DSP around the box tucking the ½” piece underneath at the end. Or, if preferred, attach the tag and then wrap the 7½” strip around the box and tag.

10. Decorate the front of the box, if desired.


The Tag (Optional)

Cut cardstock 2” x 5”. Use the Scalloped Tag Topper Punch at one end
Cut patterned paper 4¼” x 1⅞” and glue onto tag.
Glue tag to back of box.


Adhesive Holder


Materials

- Cardstock (2 x A4 or 1 x 12” x 12” sheet)
- Coordinating patterned paper (1 x 6” x 6” piece)

Equipment

- Paper Trimmer
- Paper Snips
- Bone Folder
- Multipurpose Liquid Glue
- Large scissors

Measurements

This holder is three different sized boxes glued together. The Back Box can hold Tear 'n' Tape and Stampin' Dimensionals, The Glue Dots Box can hold Glue Dots or Snail Adhesive; and the Tombow Box holds Multipurpose Liquid Glue
Instructions

1. Cut and score your cardstock as per the measurements below. 

Back Box:

- cut cardstock at 6½” x 8¼"

- on 6½” side, score at 1" and 5½” (i.e. 1” from each edge)

- on 8¼" side, score at 4¼" and 5¼"

- cut 2 pieces of patterned paper at ¾” x 2¾”

Glue Dots Box:

- cut cardstock at 5¼" x 6"

- on 5" side, score at 1" and 4" (i.e. 1” from each edge)

- on 6" side, score at 3" and 4"

- cut patterned paper at 1¾” x 2¾” for front of box and ¾” x 1¾” for left side of box

Tombow Box:

· cut cardstock at 3¼” x 6"

· on 3¼” side, score at 1" and 2¼” (i.e. 1” from each edge)

· on 6" side, score at 3" and 4"

· cut patterned paper at 1" x 1¾” for front of box and ¾” x 1¾” for right side of box


2. Use the Bone Folder to ensure crisp folds with all of the folds going in the same direction (i.e. all folded in or all folded out)

3. Using Paper Snips, cut the red lines below (the areas in grey will be discarded)

4. With the right side up, place Multipurpose Liquid Glue on the areas in blue below. Fold the smaller panels (A) over the front panels (B), and then fold the larger panels (C) over the middle panels (B). This gives a smooth edge on the outside.


5. Using long bladed scissors cut the corner of the side panel as shown below. Repeat for the other side.


6. Glue the DSP to the appropriate panels and decorate the front if desired, using labels, ribbon, buttons, etc.

Upsized Adhesive Holder
After I finished the Adhesive box above, I decided to ‘upsize’ it to hold my Snail Adhesive plus a few other bits and pieces.


Basically, I made two more little boxes and when I glued it all together, I staggered them so that no two ‘joins’ were together (on the back boxes to the front boxes).

The measurements for the two extra boxes are: 

Snail Box:
- cut cardstock at 4” x 6"
- on 4” side, score at 1" and 3” (i.e. 1” from each edge)
- on 6" side, score at 3" and 4"

Extras Box:
- cut cardstock at 4” x 8¼"
- on 4” side, score at 1" and 3” (i.e. 1” from each edge)
- on 8¼" side, score at 4¼" and 5¼"

Make the boxes in the same way as before. 

Patterned Paper:
1. Cut the patterned paper as follows:

          Front: 2" x 6½” ; glued across the whole front
          Sides: two 2" x 4" (one for each end, of course)

2. On the wrong side of the patterned paper, make a pencil mark at 2" on one of the 4" sides.

3. Cut from the 2" mark to an opposite corner to create an angle.

4. Repeat for the second side, but make sure you cut the opposite way.


And there you have it! These boxes can be made at any size you like, really, and can hold all sorts of things. I have other similar single boxes that I use to hold cards, dies and embossing folders.

Anyway, this week we'll be making origami photo frames, so see you soon.

Happy crafting!

Sunday, 9 June 2019

OnStage Swaps

I have been meaning to post photos of the swaps that I received at OnStage. There were lots and lots (I took 50 swaps with me) so here they are.

First off, these are the cards or card fronts that I received. Some simply stunning cards in there!


These are the 3-D and gift items, some very clever ideas in there.


And finally, here are some of the 3-D swaps in close-up.

This opened up and contained mini Easter eggs.

Once I removed (and ate) the Ferrero-Rocher chocolate, this is a holder for the Multipurpose Liquid Glue (Tombow). I've organised a class to make some of these, they're very handy! 

A giant paperclip (see the cotton bud beside it for comparison).

A necklace using patterned paper

A tissue holder - very handy!

A 3-D box card.

A little bag that opened up to reveal...

A handy sewing kit!

A group of New Zealander Demos got together to create a New Zealand Lolly Experience swap. VERY yummy!!

So many goodies and very gratefully received. Thank you to all with whom I swapped!

I will be back with the Multipurpose Liquid Glue holder next week, plus we'll be making a larger adhesives holder as well. Here's a sneak peek...


So, until next week, happy crafting!

Wednesday, 17 April 2019

OnStage Live, Auckland, NZ


 Kieran and I had the pleasure of attending OnStage Live in Auckland, NZ, last week. We had a fantastic time: meeting people in person that we've known online for ages, catching up with some that we'd met previously, seeing the new catalogue and new products, having the chance to play with some of the new products, and doing some serious swapping!! I made 51 swaps to take with me and ran out in just a couple of hours. I received some seriously gorgeous swaps in return and I will get some photos and show you all a little bit later. For today I wanted to share MY swaps and how I made them.

But before we get into that, a couple of photos from OnStage...

We sat right behind Shelli and Sterling Gardiner. Shelli is, of course, one of the founders of Stampin'Up!

We were able to get a photo with Shelli and her daughter, Sara Douglass, current CEO of Stampin'Up! Both are really lovely ladies, very friendly and gracious.

I finally got to meet my SU 'Mum"in person! The remarkable Kylie Bertucci.

Kylie's Crazy Crafters

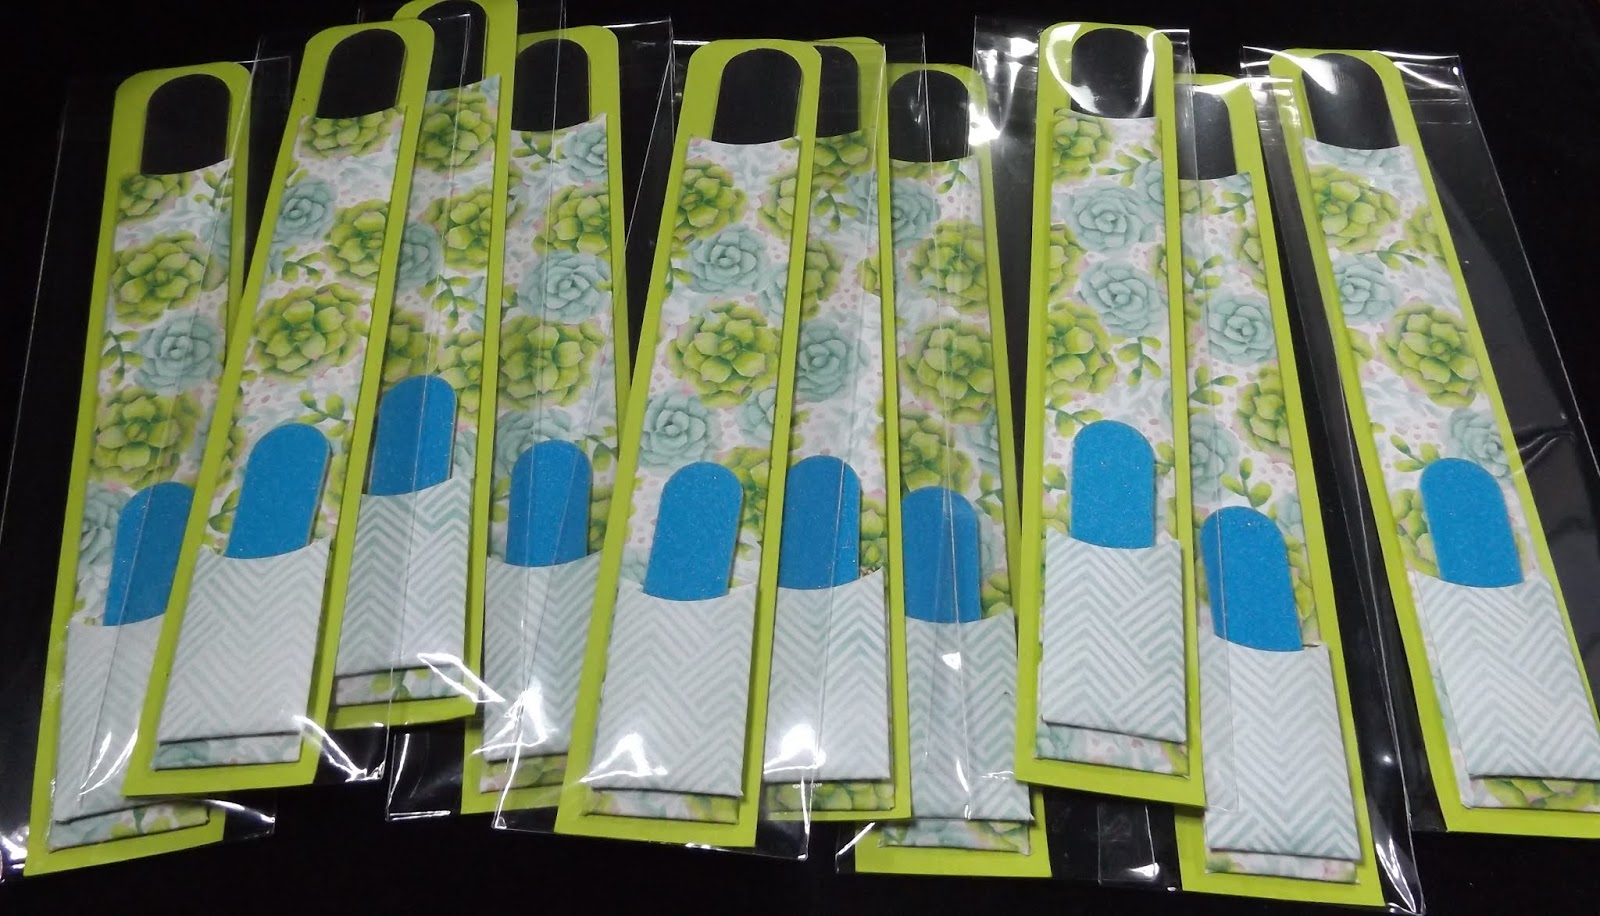
My swaps were emery board sleeves. Each sleeve holds two different sized emery boards. I bought the emery boards on eBay and was able to get a variety of colours for the smaller ones.


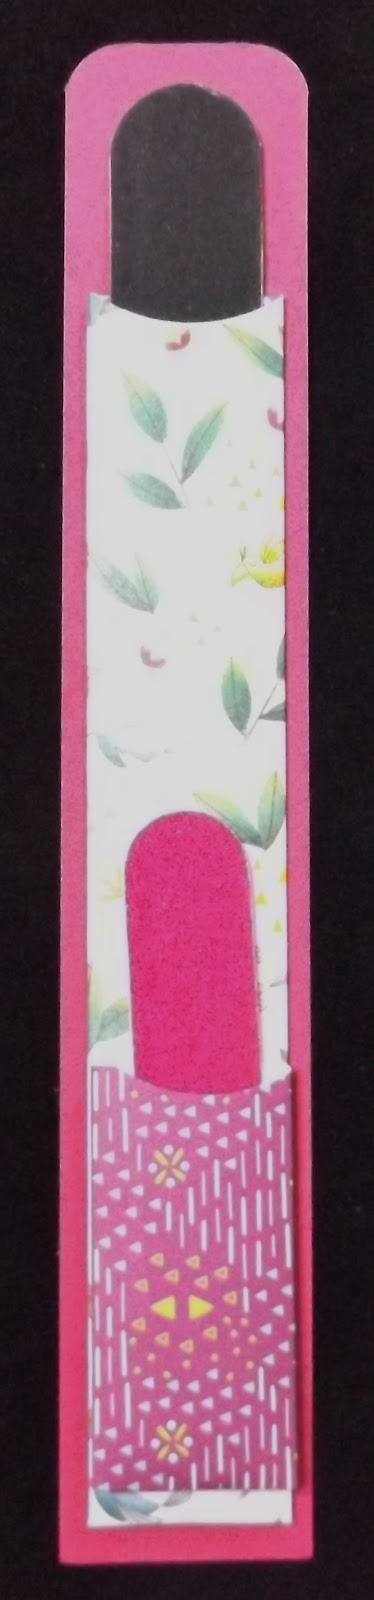
This is the one I have used for the instructions - the short emery board is a little longer than the ones in most of my swaps.


Materials

·       Plain Cardstock in a colour that matches your emery boards
·       2 pieces of Designer Series Paper (DSP) in contrasting colours/designs
·       2 Emery boards; 1 long one and 1 short one
·       Adhesive, Multipurpose Liquid Glue may be the best

Equipment

·       Stampin’ Trimmer
·       Bone folder
·       Paper Snips
·       Circle Punch (I used a 1¾“ Circle Punch, but almost any circle punch will work)
·       Corner Punch (there’s one on the Detailed Trio Punch or the Envelope Punch Board)

Instructions

NB The emery boards that I’ve used here measure 7” x ¾” (black) and 3” x ” (pink). You may need to adjust the measurements according to the size of the emery boards that you have.

1.      Cut a piece of plain cardstock 7½“ x 1¼”.

2.      Use a corner punch to round the corners at one thin end.    


3.      Cut a piece of DSP 6½“ x 2¼”, then score at ½“ on the bottom edge, ½“ on one long side and ¾” on the other long side.

4.      Cut a piece of coordinating DSP 2½” x 2¼” and score at the same measurements as the large DSP piece. 

5.      Fold and burnish all score lines.

6.      On each piece of DSP, use a circle punch and cut out an arc in the centre of the DSP at the top.


7.       Cut out the corner pieces at the bottom of each piece of DSP. Cut on a slight angle into the corners (see photo).

8.      Glue the sleeves:
a.      Fold the ¾“ side across and glue the ½“ side on top. This leaves the wider piece inside the sleeve with less chance of the emery board catching.
b.      Fold and glue the bottom side last, so the emery board can slide all the way to the bottom.

9.      Glue the large sleeve to the plain cardstock (with the rounded corners at the top). Place it about 1/8 “ from the bottom.

10.  Glue the small sleeve on top of the large sleeve, at the bottom – you can position it flush with the large sleeve or move it up just a little as I have done in this photo.


11.  Slide the emery boards into the sleeves.

12.  You could add embellishments or ribbon if you wish, but they may not ‘wear’ well if the sleeve is placed into a handbag or similar.

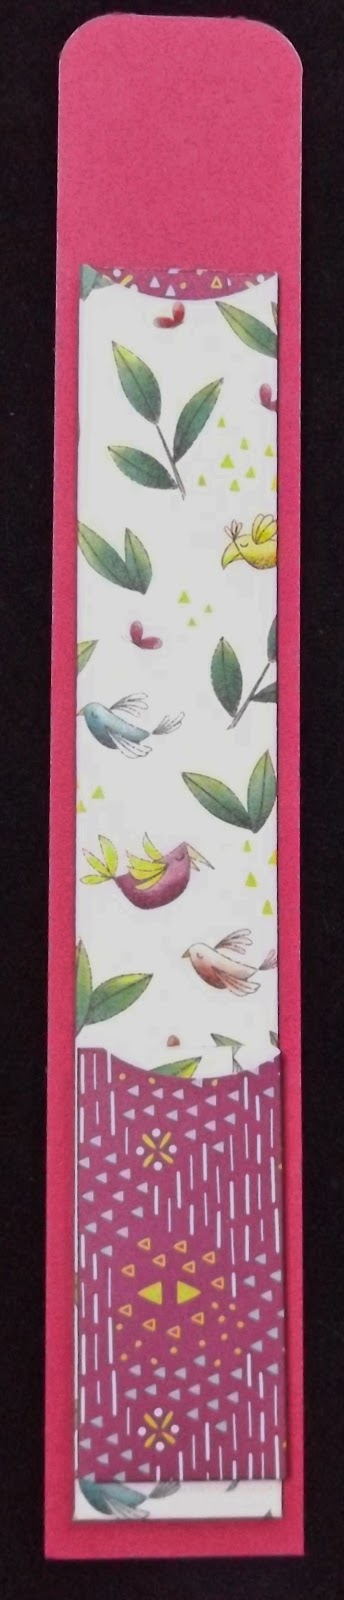
13.  I finished mine off with a couple of stickers on the back.


Most of the ones I swapped were made with a slightly smaller coloured emery board that measured 2¼“ x “ and I cut the small DSP 2” x 2¼“. 

Thanks for visiting. Happy crafting!