I know I said I was going to post about the small gift boxes and pinwheel embellishments, but I'm still working on the boxes so I've decided to give you all a run through of the basic equipment and materials needed to make cards. People, like myself, who have been making cards for a while forget that somebody who is new to card making may not know what they need. So I made up this document to give to new customers. If you'd like a copy of the original document, just let me know and I can send you a copy via Messenger or email.
Basic Equipment
There are a few items that are
essential for card making. Here is a list of the ones I think every cardmaker should have.
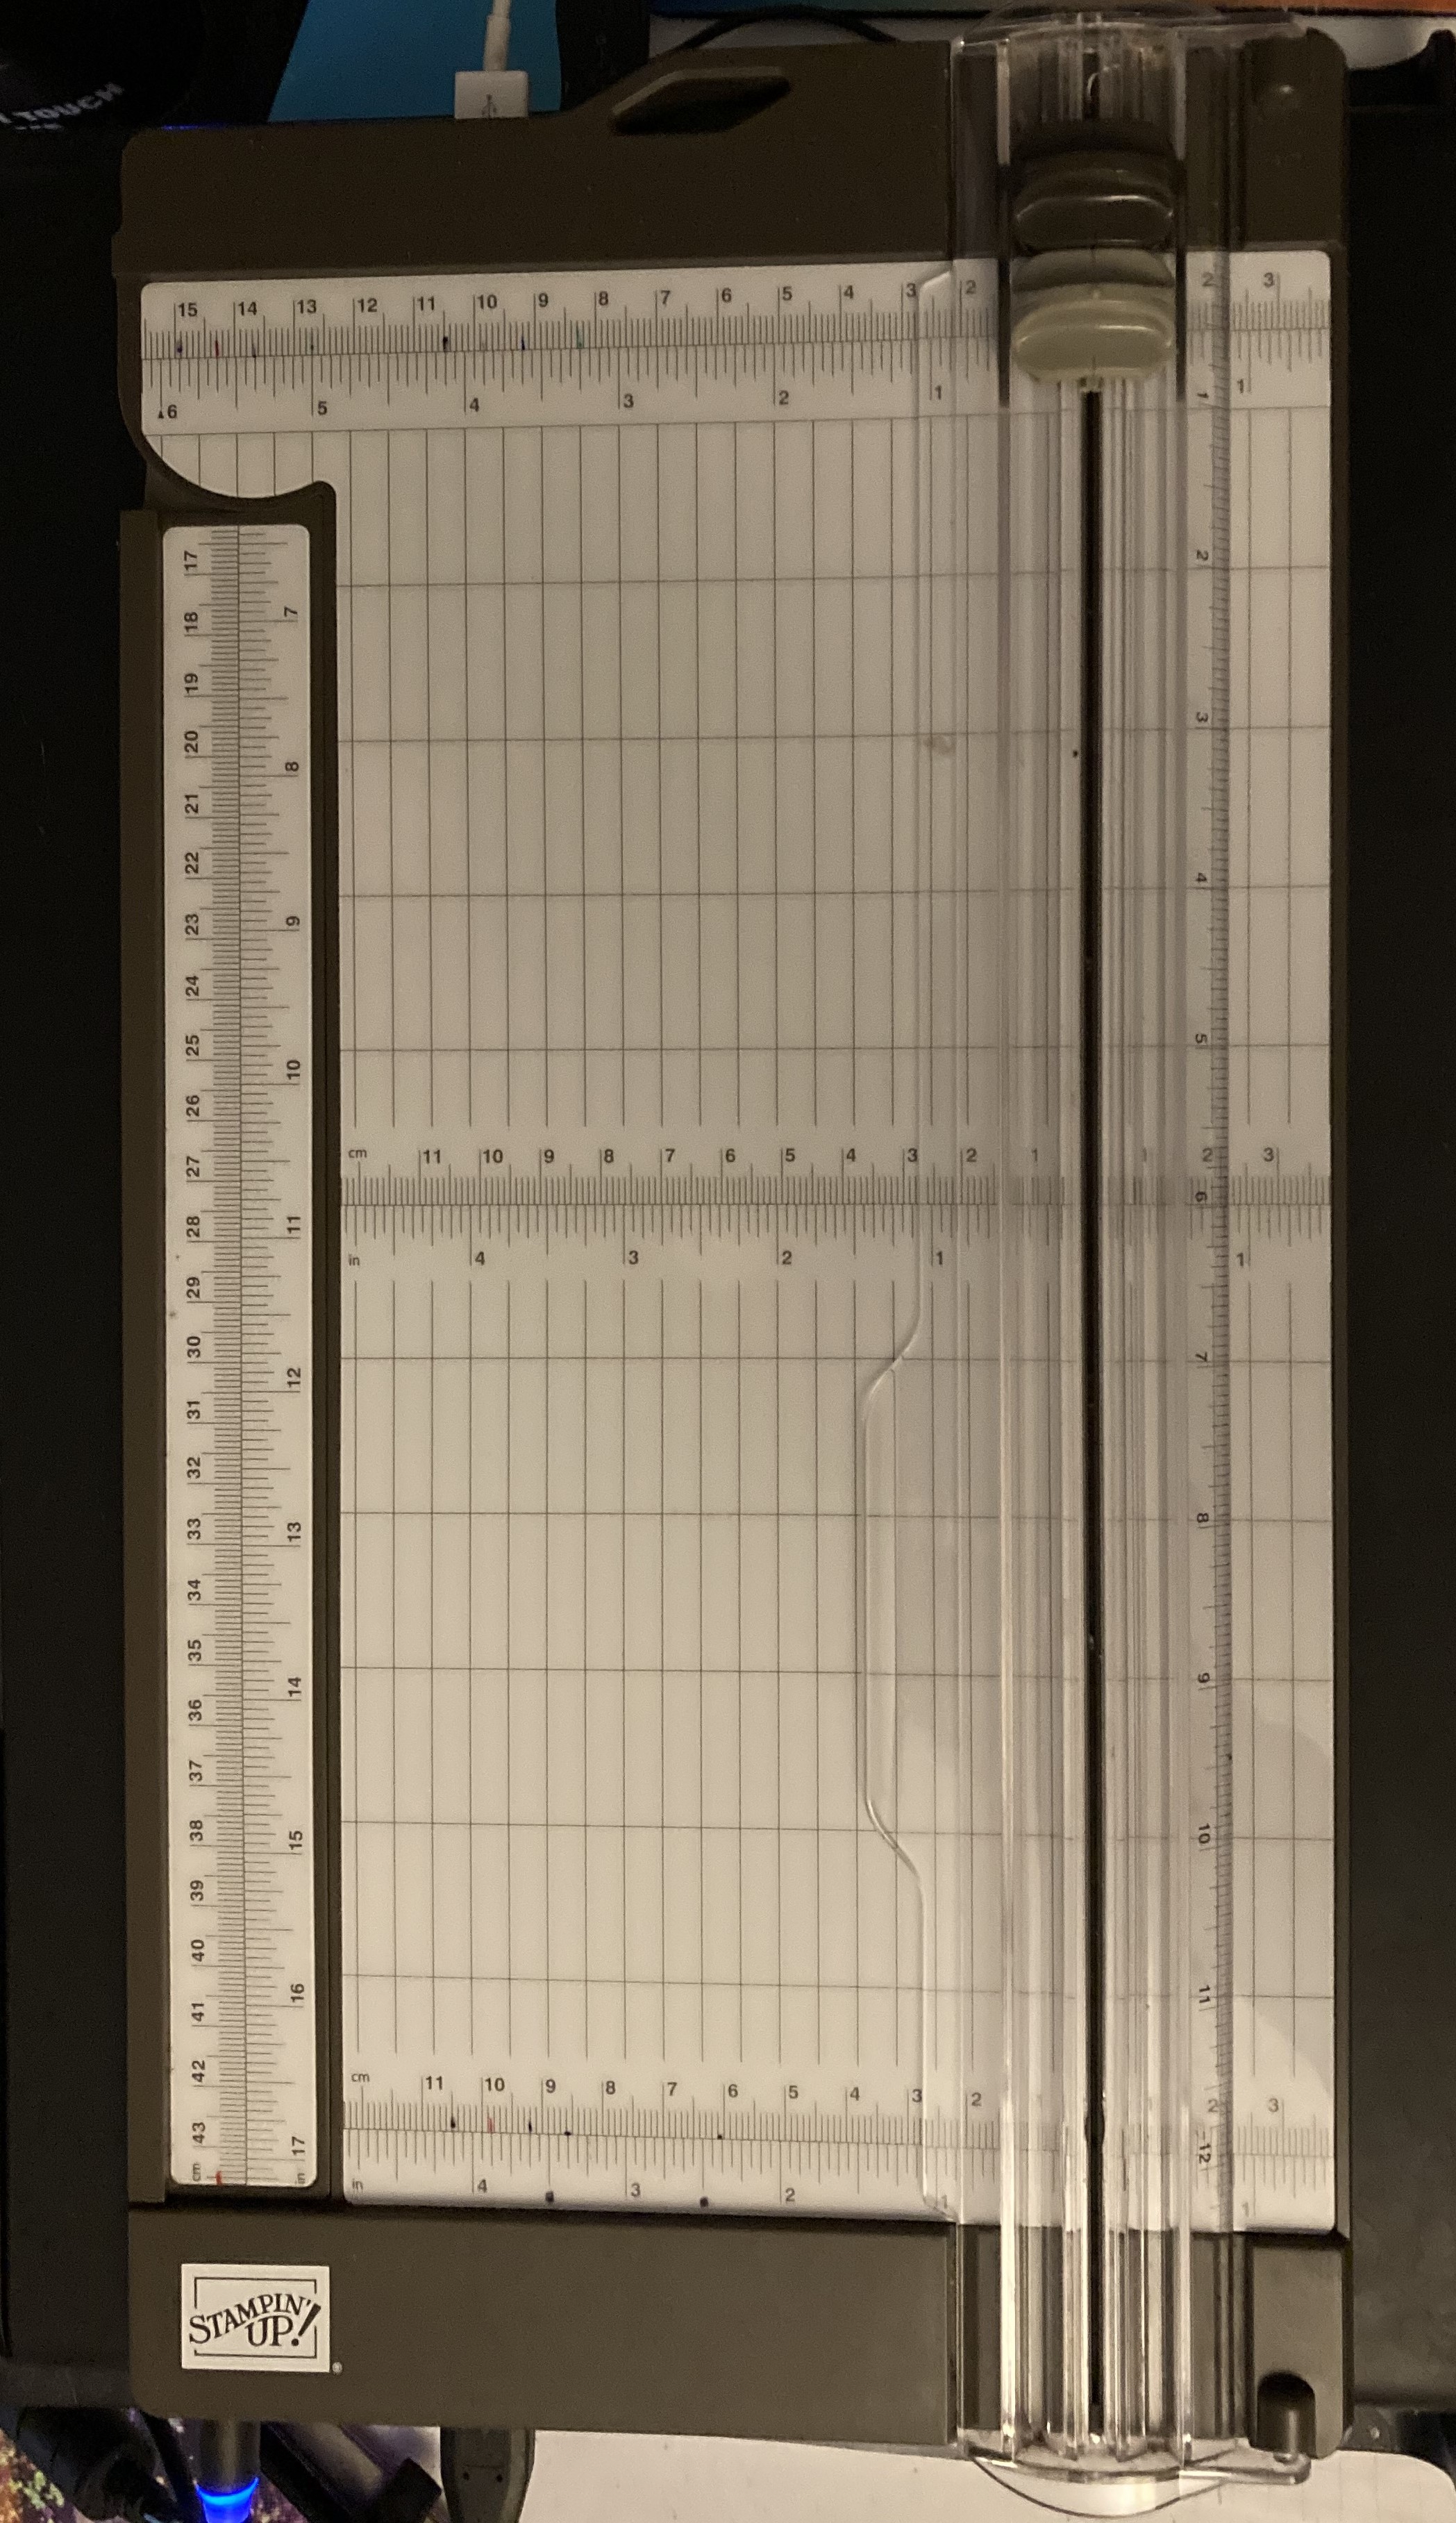
· Paper Trimmer. A good paper trimmer is essential
for cutting cardstock and paper. I prefer one that has a wide base for
cutting up to 6¼" and has an extending arm for trimming up to 14½", if required. It has a cutting blade as well as
a scoring blade and is easy to use. It also has storage underneath for
replacement blades (available separately) or small tools.
· Bone Folder. These are used to burnish cardstock
as well for scoring and distressing.
· Adhesive. Adhesives come in many
types. Some types are better than others for certain things, e.g. I would use super-strength tape for adhering ribbon, but otherwise it's whatever suits you better. Personally, I
use double-sided tape mostly.
o
Double-sided tape
o
Roller
tape
o
Super-strength tape for heavier embellishments
o
Multipurpose
Liquid Glue – liquid glue that dries clear; has a fine tip and a broad tip
· Sharp
scissors in two sizes:
o
Large ones to
trim a piece of card or paper, if necessary
o Small ones for more delicate trimming or for cutting out a stamped
image or pictures from a larger sheet, commonly called 'fussy cutting'.
· Pencil. Either a regular wooden one (in which case you will
need a sharpener as well) or a mechanical pencil with replacement leads. And
don't forget an eraser.
· Ruler. I recommend a metal ruler with both imperial and
metric measurements.
· Pick Tool. A sharp pointed tool to use with
embellishments, e.g. rhinestones, to pick them up and position them.
Stamping
Essentials
You don’t have to stamp
anything on your cards, but they look a lot better with images or sentiments
stamped on them.
· Stamps. Rubber stamps come in three types. It's a
personal preference as to which type you use.
|
|
|
|
|
These are rubber stamps, usually red, with a small pad behind them. They are
not, as the name suggest, clear, but are used with a clear block.
Pros:
Cheaper than wood-mount, they're also lighter and take up less shelf space.
Cons: You
need to have the appropriate clear block to use them, but you can re-use the
blocks over and over.
|
The same as the clear-mount stamps but they come with wooden blocks for you
to mount them.
Pros: Once
they've been mounted onto the wooden blocks, they're ready to go.
Cons:
They're more expensive and take up more shelf space.
|
These are the totally clear stamps; you can see right through them and can
position them more precisely.
Pros: You
can see exactly where you are placing them when stamping.
Cons: You
need to have the appropriate clear block to use them. Some inks will stain
them but doesn't affect the quality or image.
|
· Clear Blocks. They range in size but I mostly use one measuring 3" x 3". Of course, larger stamps need larger blocks.
· Stamping Mat. Similar to a mouse pad but a little thicker. Place it underneath your cardstock when stamping, helps to
provide even pressure and makes a crisper image.
· Stamp Cleaner. Clean your stamps regularly to keep them in peak condition.
· Ink Pads. Obviously, if you have stamps then you need ink
pads. Classic Stampin' Pads use a dye-based, fast drying ink. They are acid
free and use a firm foam pad that lasts longer than felt pads.
Best of all, the colours all coordinate with Stampin’
Up! cardstock, markers, and embellishments. There are 46 colours plus Archival
Pads in black and grey. Archival ink is a permanent ink that is suitable for
use with watercolour pencils and markers.
o
As a bare
minimum, get the Basic Black Archival
Stampin’ Pad (140931, p 185).
You
should also consider:
o
2016-2018 In
Color Classic Stampin' Pads (pack of 5) (141818)
o
2017-2019 In
Color Classic Stampin' Pads (pack of 5) (144081)
o
Other colours are
available in packs of 10 assorted colours, apart from Neutrals which is a pack
of 6.
What
Stamps To Get?
It is, of course, personal
choice, but I'd suggest starting with one or two 'all-purpose' sentiment stamps
like the ones below. There are so many beautiful images to choose from as
well. Take the time to have a good look in the catalogue. Check Google or
Pinterest for photos of cards made with various stamp sets. Simply search by
the name of the stamp set (and the words 'stampin up' to be sure to get the right stamp set) and let them inspire you.
Picture:
|
|
|
Name:
|
Better Together
|
Special Celebrations
|
Item Code:
|
|
|
Description:
|
This stamp set includes
sentiments for a new baby, weddings, sympathy, Christmas and birthdays, as
well as a few basic images for decoration.
|
This stamp set includes
stamps that can be used on the front of a card as well as inside the card. This
stamp set will work for love, marriage, friendship, congratulations, baby and
birthdays.
|
Other Equipment
These will help and are nice to have, but aren’t essential.
· Punches (p 206-208) – easily punch out a variety of
shapes
· Big Shot (143263, p 209) – a machine for die-cutting
or embossing
· Dies (pp 212-216) – Cut out lots of shapes including
words. A Big Shot is required for these.
· Embossing Folders (pp 210-211) – these create great
texture and patterns on your cardstock. These also need a Big Shot.
· Simply Scored (Scoring Board) (122334, p 2015) – note
that you can score with the Paper Trimmer as well as cut.
· Tweezers, for picking up those small bits and pieces.
Basic
Materials
·
12" x
12" or A4 Cardstock for card bases (page 194):
o Whisper White
o Very Vanilla
o Various other colours
· Stampin’ Dimensionals (104430, p 203) or Mini Stampin’ Dimensionals (144108, p 203) – double-sided foam pieces to create extra depth and dimension to your cards.
·
Designer Series
Paper (pp 187-189) – patterned paper to make your cards look pretty
·
Rhinestone Basic
Jewels (144220, p 197) or Pearl Basic Jewels (144219, p 197)
·
There are plenty
of other pretty embellishments as well on pages 196-197.
·
Ribbon or twine
(optional) – many sizes, textures and colours available. See them on pages
198-199.
To Make a Simple Card
1. Cut your card bases.
a.
For 12” x 12” Cardstock
·
Cut
at 4” - this piece will measure 4” x 12”.
-
Score
this piece at 6” on the long side.
 |
| Cut on red line, score on blue dotted line |
·
Then
turn the paper 90 degrees and cut at 6” – this will give you two pieces
measuring 6” x 8”.
-
Score
these pieces at 4” on the long side. (You can score before cutting if you like)
 |
| Cut on red line, score on blue dotted line |
·
This
will give you three cards, each measuring 4” x 6”. They can be used portrait of
landscape.
b. For A4 Cardstock:
·
Cut
at 5⅞” on the long
side
·
Score
each piece at 4⅛”
 |
| Cut on red line, score on blue dotted line |
·
This
will give you two cards, each measuring 4⅛” x 5⅞”. These can be used in portrait or landscape.
c. All of the cards can be used in any
configuration that you like. Cards can open upwards or sideways – whatever you
choose.
2. Cut your Designer Series Paper (DSP)
- Generally, it’s a good idea to cut the DSP
slightly smaller than the actual card so as to provide a frame. You can
cut it any size that you want, but around ¼”-½” smaller is best.
b. For cards made from 12” x 12”
cardstock, it’s easy – just cut the DSP 3¾” x 5¾”, or 3½” x 5½”.
c. For cards made from A4, to avoid all
those nasty eighths of an inch, just go the same as the others: 3¾” x 5½”, or 3½” x 5¼”.
d. These sizes are not set in stone. You
can make them bigger or smaller, they don’t even need to leave the same sized
border all around – it’s up to you.
e. You can create a layered effect by
cutting a mat of contrasting plain cardstock at the larger of the DSP
measurements, then cutting the DSP at the smaller size. Or vice versa!
- Stamp any images
or sentiments onto the card, or onto contrasting cardstock if using
punches or dies. If you don’t have punches or dies, you can still stamp
onto contrasting cardstock and cut it out with your trimmer or scissors.
- Use adhesive to stick down your elements. It’s generally
best to add embellishments, such as rhinestones, after the card has been
put together. However, if you want to use ribbon or twine, then add these
to your contrasting cardstock or DSP BEFORE sticking it to your card base.
For ribbon, I find it best to place the adhesive on the surface of the
cardstock/DSP and then place the ribbon on top. Wrap it around to the back
and adhere it there as well.
Examples of Basic Cards
Some Other
Card Styles
 |
| Double Z-Fold Card - nice and easy, but looks awesome |
 |
| Double Front Card (This is the card I made for my granddaughter's first birthday) |
 |
| Fun Fold Card - really easy and great looking |
 |
| Front Fold Card - another one that looks fabulous but isn't too hard to make |
Hopefully this will help all new card makers and maybe even serve as a reminder of what's out there to some not-so-new card makers.
P.S. I f you find a link that doesn't work, please let me know. Thanks.