Saturday, 15 January 2022

Abstract Beauty Suite Collection

 I needed four birthday cards but am away from my craft supplies at present. Fortunately I had just received the Abstract Beauty Suite Collection (click on the name to see it in my online shop) and was able to cobble together some basic cards.


This collection contains lots and lots of cool stuff:

Abstract Beauty Cards & Envelopes
Abstract Beauty (4" x 6") Designer Series Paper
Abstract Beauty Ephemera Pack
Beautiful Shapes Dies
Hello Beautiful Stamp Set
Adhesive-Backed Hexagons

I used the Cards and Envelopes, the Ephemera Pack, the Designer Series Paper, and the Hexagons and created some pretty cards with no-so-pretty sentiments (I had to write them by hand, lol). Here's what I came up with.


The DSP is so pretty and each sheet has gold accents.


You could do worse than getting a hold of this collection and see what YOU can create!

Happy Crafting!

Thursday, 9 December 2021

Christmas Baubles

 It's been a while since I blogged anything, so I thought I'd show off my Christmas Baubles.


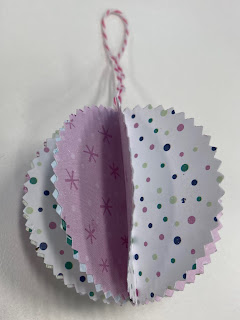
These are so simple to make and look quite good! You can create a template in different sizes and shapes and use them to cut out your pieces if you want, but I 'cheated' and used punches for them all, much quicker and easier.

The basic instructions are simply to cut/punch eight copies of the same shape. If you want you can use two different DSPs. Glue 4 together (alternating the DSP if using two), set them aside and glue the other 4 together. Place some adhesive down the middle of one half and attach a piece of string or cord, then glue the two halves together. If you're using two DSPs, make sure your second half matches the first half so that your bauble has alternating paper all around. 

Let me show you my baubles.

Basic Bauble


I used Penguin Playmates Designer Series Paper, which was a free Sale-A-Bration item and is, sadly, no longer available.

I punched 4 of each of the two designs of DSP, and then put it together as mentioned earlier. I used the Starburst Punch (retired) to punch out the circles.

Shaped Baubles


I thought that different shaped punches might make interesting baubles. From the left I used Label Me Lovely Punch, Pretty Label Punch (retired) and Scalloped Heart Punch from the Heart Punch Pack, all with with Painted Christmas DSP. I think they turned out rather well - the photos don't do them justice, although the one on the right looks more like a strawberry than a heart, haha. 


The Other Baubles


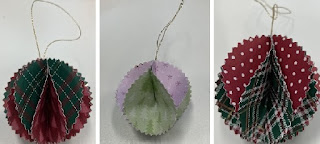
I don't know what to call these ones. When you put these together, you only glue the top third of each shape as per a Basic Bauble. After you've joined them all together, you go through and glue the bottom thirds of the ones that aren't glued. It makes sense when you're doing it. The one on the left is the first one I made (at home) using Wrapped in Plaid DSP (retired). The middle one was one I tried to make at our Craft Group night using Painted Christmas DSP, but I mistakenly glued all of the pieces together (so a Basic Bauble as above) and then went through and glued the tops and bottoms of the alternate sides. Of course it wasn't right but I decided I'd just made a new design rather than a mistake :). Then I made the one on the right with some more Wrapped in Plaid DSP (retired) to prove to myself that I could get it right. Obviously you need to choose paper that has suitable patterns or images on both sides as you get to see both sides.

I donated all of my baubles to the Woomera Community Centre Christmas tree because it only had tinsel and no decorations, lol.

Anyway, I wish you all a very Merry Christmas and a Happy and Healthy New Year.

Happy crafting!


Tuesday, 23 February 2021

Dutch Door Card

 Our craft group had a class tonight to make this Dutch Door Card. 


Here are the instructions for this specific card. As usual, click on the product names to go to that item in my online store. Thanks.

MATERIALS

Bumblebee cardstock (card base)

Ice Cream Corner Designer Series Paper (small piece for card front)

Basic White cardstock (for front and inside)

Tear & Tape or Stampin' Seal

Frosted & Clear Epoxy Droplets


EQUIPMENT

Paper Trimmer

Bone Folder

Here's a Card Cling Stamp Set

Clear Block D

Memento Tuxedo Black Ink Pad

Ice Cream Cone Builder Punch

Cherry Cobbler Stampin' Blends


INSTRUCTIONS

Card Base

1. Cut Bumblebee A4 cardstock at 5-3/4" along the long side. Note that this is slightly smaller than the usual 'half of an A4' cut for a card base; this is simply to avoid having to use sixteenths of an inch in later measurements.

2. Score at 4-1/8" on the long side (i.e. half-way across the card).

3. Place the card base in the Trimmer with the score line at 90 to the the cutting guide arm and with the left edge at 2-7/8" cut from the top to the score line.


4. Turn the card base so that the cut line is to the right and place the card base into the Trimmer with the score line directly under the cutting blade (the left edge will be at 4-1/8"). Cut along the score line down to the previously cut line. If necessary, use Paper Snips to get a clean cut at the corner.


5. This will give you two pieces like this:


Inside

1. Cut a strip of the Basic White cardstock at 3-7/8" from one of the small ends. Then using that, cut a piece 5-1/2" for the inside of the card.

2. Cut another piece 2-5/8" for the front of the card (3-7/8" x 2-5/8").

3. Adhere the larger piece inside the card.

Card Front

1. Cut a piece of the Ice Cream Corner DSP 3-7/8" x 2-5/8".

2. Attach to the lower front of the card using the inside white piece as a guide.

3. Punch the ice cream cone and a scoop of ice cream from the Ice Cream Corner DSP.

4. Stamp "Happy Birthday" at the bottom of the Basic White piece cut earlier, then adhere the ice cream cone and scoop above it.

5. Add a 'cherry' on top by colouring a Clear Epoxy Droplet with a Cherry Cobbler Blend (let it dry before attaching it to your card).


6. Adhere this combination to the front of the card. Take care to only place adhesive on the bottom of the piece so as to not glue the card shut. See the photo below for suggested positioning of the adhesive. Notice the piece of adhesive on the actual card front. This is easier than trying to figure out where to place it on the smaller piece.


And that's your card, all done!

My daughter, Kieran, used some different pieces of the DSP for her cards.


I tried some variations. You can get some quite different looks.


With this one, I used two different pieces of DSP, instead of the plain background. I'm calling this one my 'Retired Christmas Card' because I used retired DSP and a retired stamp set for this. Sorry about that! The Label Me Lovely Punch is still available though.


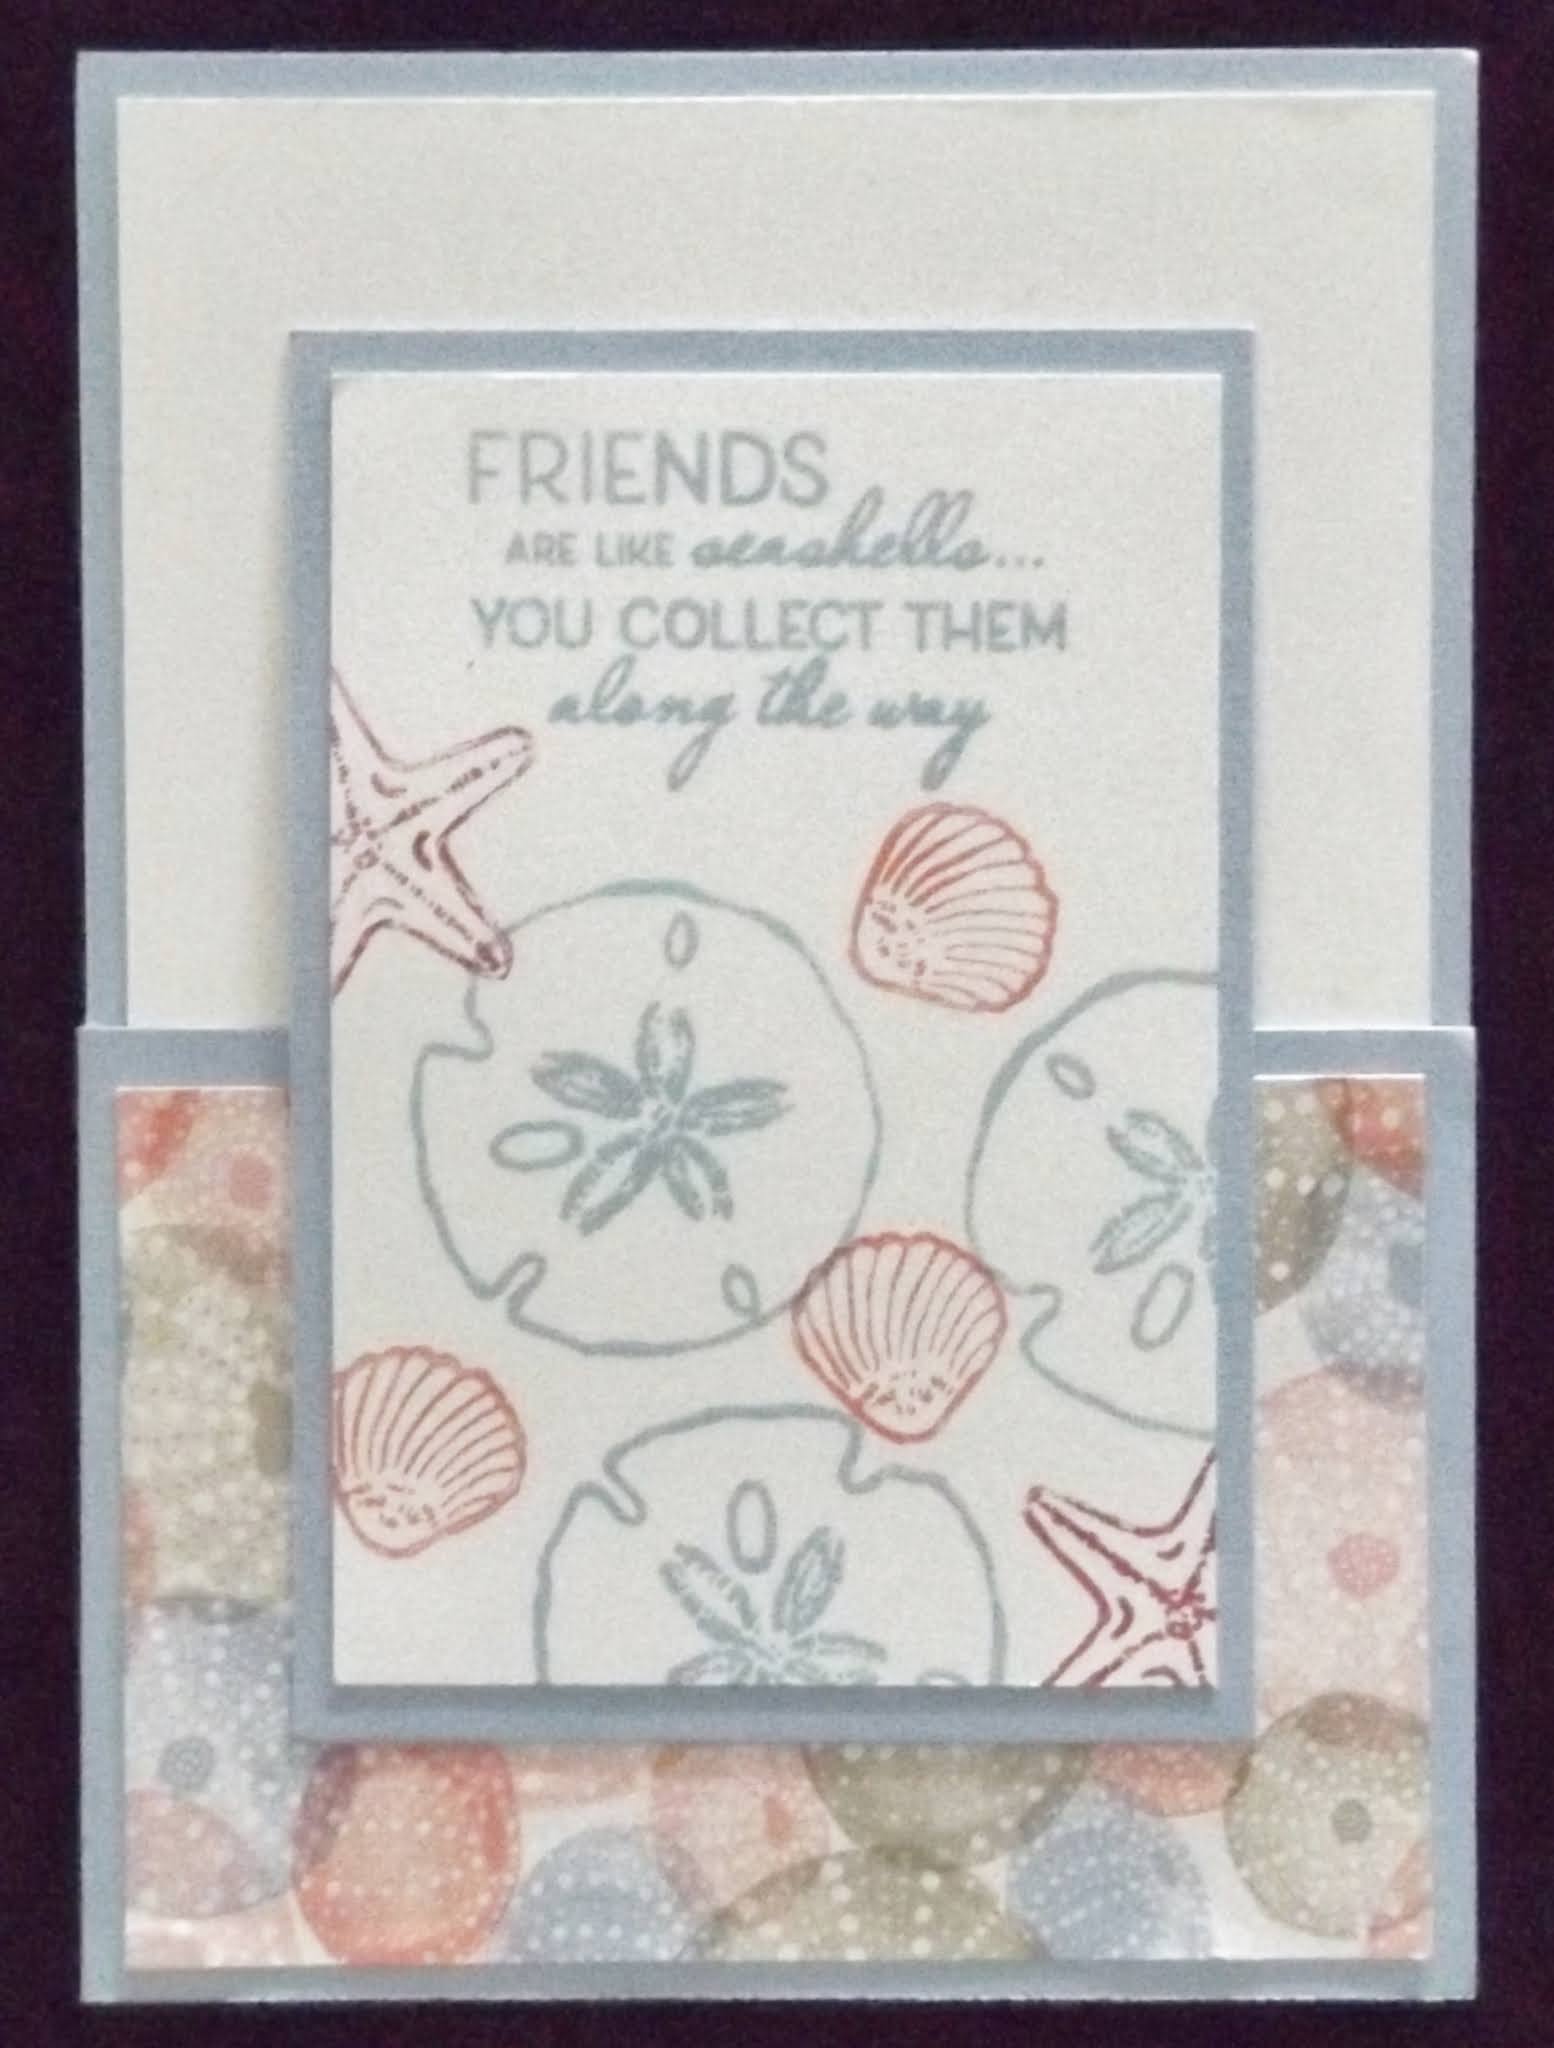
Finally, I stamped a background and sentiment using the Friends Are Like Seashells Photopolymer Stamp Set. The base is Seaside Spray A4 Cardstock and the DSP is Sand & Sea. I used these Classic Stampin' Pads: Flirty Flamingo, Melon Mambo and Seaside Spray. I love the pastel colours of this one.


I wish to thank Jessica Taylor for inspiring me with her Dutch Door Card. Please have a try, it's quite easy and just a little bit addictive!

Happy crafting.


Wednesday, 17 February 2021

You Are Amazing Project Kit

 I love Stampin' Up! project kits. They are always so easy to make and contain plenty of beautiful cards. 


This one is the You Are Amazing Project Kit that contains most of the necessary bits and pieces to make 16 cards (four each of four different designs). Everything is pre-cut, all you need to do is stamp the sentiment and assemble the cards. You will need the You Are Amazing Cling Stamp Set, plus some ink pads and some other basic bits, many of which you may already have.

Classic Stampin' Pads: Flirty Flamingo, Granny Apple Green, Mango Melody and Pretty Peacock.

Basic bits: Stampin' SEAL, Stampin' Dimensionals and Mini Glue Dots

Click on any of the product names to go to my online shop, in case you need to purchase any of these, including the kit and stamp set.

Here are close-ups of the four card designs:


So, if you're looking for quick and easy cards, you can't go past a project kit like this!

Happy crafting.


Monday, 18 January 2021

Mini Catalogue 2021-1 and Sale-A-Bration 2021-1

It's freebie time again! Stampin' Up! have changed the way Sale-A-Bration (SAB) will be held each year. Previously there was one SAB in January-March for 3 months. From 2021 onwards, there will be TWO SABs each year, one in January/February and one in July/August, that means 4 months of free stuff per annum!  Any purchase of $90 (AUD), excluding postage, from any of Stampin' Up!'s current catalogues will entitle you to one free level one SAB product. Sales of $180 will let you have two level one products or one level two product. It's all explained in the Sale-a-Bration section in my online store. The new Mini Catalogue for January-June 2021 is also available and you can see that in my online store as well. Just click on the names to go to the store.

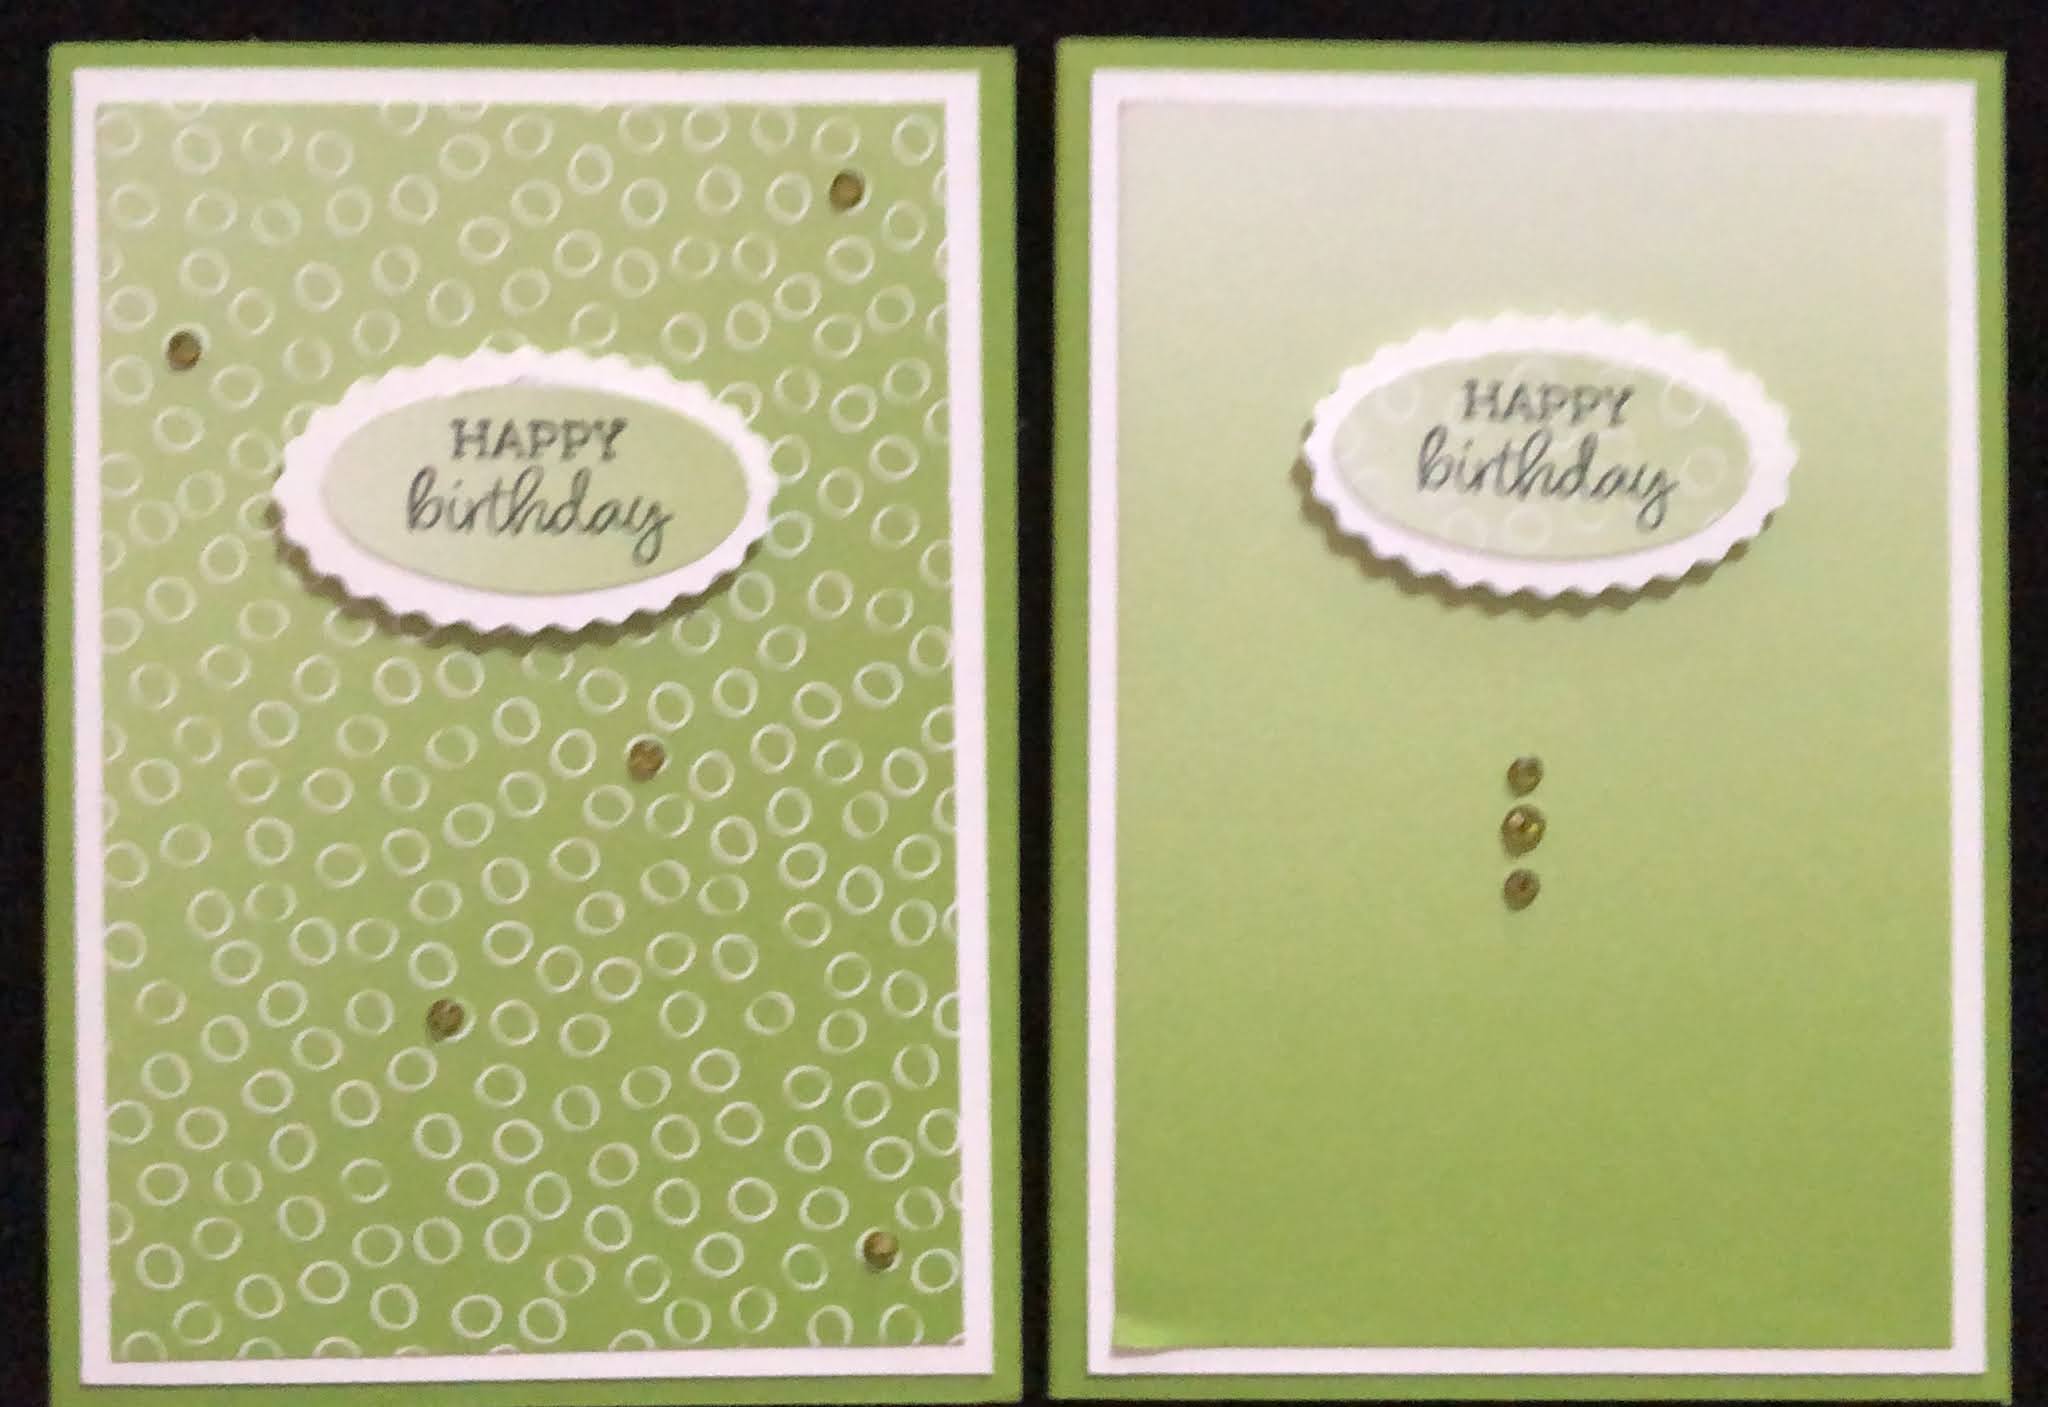
I have a few cards to show you. I made these using a free SAB item, It's called Oh So Ombre 6" x 6" Designer Series Paper. It's a level one product, so a purchase of $90 will get you your very own pack. There are 48 sheets in the pack: 12 each of a double-sided design in four colours. All of the cards feature a new punch called Double Oval PunchThis great punch has both a scalloped oval and a smooth oval. There is a matching stamp set called Oval Occasions Cling Stamp Set that has perfectly sized stamps. You can save by purchasing both together in the Oval Occasions Bundle

So here are my cards. I've noted the colour used in each. 

Rococo Rose


Bermuda Bay


Granny Apple Green


Blackberry Bliss

Nothing fancy with this lot, but they look quite nice. Be sure to check out the links above to see what else is there.

Happy crafting!

Sunday, 5 July 2020

2020-2022 In Colors


We've got a new Annual Catalogue and with that come the new In Colors that are only available for two years. The colours are very mellow this year but, as always, are lovely. I decided to make some monochrome cards using 2020-2022 In Color 6" x 6" DSP (pictured below) and 2020-2022 In Color A4 Cardstock. The colours (from the top) are Bumblebee, Cinnamon Cider, Just Jade, Magenta Madness and Misty Moonlight. Just click on any of the product names to see them in my online store. We also have Bonus Days running right now (1 July to 3 August 2020) - more on that later.


I often save photos of cards I've seen on Facebook so I decided to use some of them to inspire me today. These are what I came up with...


This is Misty Moonlight. I simply cut the DSP to size, sliced them up and adhered them to the card bases, added sentiments from the Share Sunshine PDF Download (it was a charity thing that Stampin' Up did earlier in the year) and added some bling. The labels were made using the Story Label Punch.


Magenta Madness might just be my favourite new colour this year. It's so bright and cheery. For the card on the left, I cut a mat using the DSP, then used the retired Starburst Punch on it. Then I cut the piece 1.5" from each side. I used the retired 1.75" Circle Punch using plain cardstock with a sentiment from the Many Mates Cling Stamp Set. Sorry about using retired products, but I only have a few products in my house, most of them are in a different building where I do my craft classes. You could use some of the dies in the Layering Circles Dies for the same effect. For the second card (on the right) I just cut a full size mat from the DSP, used the Starburst circle from the other card and a plain Whisper White circle for the sentiment.


Just Jade is another really nice colour. For the card on the left, I cut a full size mat, then positioned it diagonally on my Paper Trimmer so the top left corner was on the 1.5" line and the opposite corner was on the 1.75" line. A quick cut, put the triangle aside, then turned the remaining DSP around and did the same again. Adhere the two triangles onto the card and add the sentiment. I used the Heart Punch Pack for the labels. This is a great pack, you get one scalloped heart punch and a plain slightly smaller heart punch. Great for nesting labels. The sentiments were from the Many Mates Cling Stamp Set again. The card on the right was pretty much the same as the similar Magenta Madness one, but I used the Heart Punches instead of circle punches. The heart has to be positioned at the bottom because of the orientation of the punch, but it looks great there anyway. The piece punched out with the Scalloped Heart Punch was used as a label mat on the left-hand card.


As I said earlier, I was going for monochrome cards, but when I went to score the A4 Cinnamon Cider cardstock to make the card base, I cut instead of scored. So I decided to use the last two colours together. The one on the left is similar to the Misty Moonlight one, but the two 'columns' are the same width on this one. The card on the right is simply a piece cut to size then a couple of smaller pieces were lopped off and adhered to the card, leaving the centre bit empty, perfect for the label, obviously! Both labels are punched using the Label Me Fancy Punch and stamped with stamps from the Many Mates Cling Stamp Set (again!).

This shows the various sentiments in the Many Mates Cling Stamp Set. So many great sentiments!

So, that's how I spent my Sunday afternoon. I hope you had a great Sunday as well.

Oops, I almost forgot to tell you about Bonus Days. For every $90 you spend 1 July to 3 August 2020 (before shipping) you will receive a $9 Bonus Days coupon that you can redeem 4-31 August 2020. There is no limit to how many coupons you can get, so you can shop all month!

Happy crafting!

Sunday, 23 February 2020

Mini Catalogue and Sale-A-Bration 2020

 It's Sale-A-Bration time again, my favourite time of year. If you live in Australia, spend $90 on ANY Stampin' Up! items and receive a free item from the Sale-A-Bration range. Some of the freebies require a $180 spend, but most are just $90. You can choose items from the new Mini Catalogue or from the Annual Catalogue. If you live outside of Australia, check with your demo to find out how much is required for the freebies. Sale-A-Bration runs until the end of March, while the Mini Catlogue items are available until June.

I've been playing with some of the new items (and some of the free items), so here's a little gallery. I've listed the materials used below each card (click on the names to open a new window showing that item). I've also noted whether the item is from the Annual Catalogue (AC), Mini Catalogue (MC), or Sale-A-Bration (SAB).

Birthday Bonanza Designer Series Paper (MC)
Heart Punch Pack (MC)
Little Ladybug Host Cling Stamp Set (SAB)
Note that the stamp set is only available if you host a $500 party during Sale-A-Bration.

Tropical Oasis Designer Series Paper (MC)
Heart Punch Pack (MC)
Music From The Heart Photopolymer Stamp Set (MC)

Tropical Oasis Designer Series Paper (MC)
Heart Punch Pack (MC)
Little Ladybug Host Cling Stamp Set (SAB)

Tropical Oasis Designer Series Paper (MC)
Heart Punch Pack (MC)
Painted Glass Cling-Mount Stamp Set (AC)
Here's A Card Cling Stamp Set (AC)

Tropical Oasis Designer Series Paper (MC)
Heart Punch Pack (MC)
Little Ladybug Host Cling Stamp Set (SAB)

Birthday Bonanza Designer Series Paper (MC)
Starburst Punch (AC)
1-1/2" Circle Punch (AC)
1-1/8" Scalloped Circle Punch (AC)
These are the new Designer Series Paper packs in the Mini Catalogue. I have some that I haven't had a chance to play with yet but soon, I hope. All of them now come in Suite Bundles that contain all of the coordinating items. That makes them so much easier to be sure you get everything you need. Of course, the DSPs and coordinating items are all still available separately, if preferred.

From My Heart Specialty Designer Series Paper

From My Heart Suite Bundle
  
Parisian Blossoms Designer Series Paper

Parisian Blossoms Suite Bundle

Tropical Oasis Designer Series Paper

Tropical Oasis Suite Bundle
Birthday Bonanza Designer Series Paper

Birthday Bonanza Suite Bundle
  
Country Club Designer Series Paper
I just HAD to get this one to make cards for my golf-mad hubby.


Peaceful Poppies Designer Series Paper

Peaceful Poppies Suite Bundle

Best Dressed 6" x 6" Designer Series Paper

Best Dressed Suite Bundle
There's one last DSP that doesn't come in a suite bundle, but has been designed to coordinate with four great punches. I just love Stampin' Up!'s punches; they're so easy to use even with my feeble hands. These are all very versatile, too, not just for use with the DSP; you'll note that I used the Heart Punches on some of my cards above.

Pleased As Punch Designer Series Paper

Heart Punch Pack
This has two punches, the scalloped edged one is slightly larger than the straight edged one.

Umbrella Builder Punch

Tulip Builder Punch
Small Bloom Punch
This is one of the free items but you need to spend $180 to get it. 

Each of the punches have matching stamp sets as well, of course, but I won't clog up the page with more photos. Click on these links to see everything for yourself:
If you'd prefer paper copies of either (or the Annual Catalogue), just let me know and I'll get them out to you.

That's all from me for now. Happy crafting!