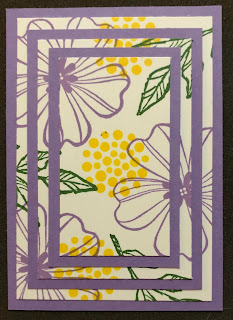
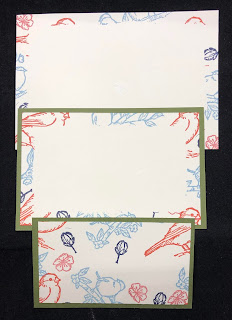
My ATC group has a monthly theme, then every three months we add a technique to the mix. This month (June) we had Triple Stamping as the technique, and Flowers as the theme. These are the ATCs that I made.
Materials
·
1 x Dark coloured
A4 cardstock (card base and mats)
·
1 x White
or other light coloured A4 cardstock (stamping pieces)
·
Adhesive Tape, or another low-tack adhesive
Equipment
·
Paper Trimmer
·
Bone Folder
·
Stamp set
·
Ink pads
·
Label Punch
Instructions
1.
Using the dark
cardstock, cut three pieces:
· 8” x 5¾”, scored at 4” (Card base)
· 5” x 3¼” (Middle mat)
· 4¼” x 2½” (Small mat)
2.
Using the light-coloured
cardstock, cut three pieces:
· 5½” x 3¾” (Large stamping piece – this adheres to the
card front)
· 4¾” x 3” (Middle stamping piece)
· 4” x 2¼” (Small stamping piece)
3.
Take the three
light coloured pieces and use a tiny amount of Snail Adhesive to glue the three
pieces together, stacking them centrally on top of each other.
4.
Using an Ink Pad
that co-ordinates with the coloured cardstock, stamp images randomly on all of
the stacked cardstock. Use more than one image and colour for contrast. Don’t
worry with the ‘missing’ pieces of the image that happens where two pieces of
cardstock join up. These will be covered later by the mats.
5.
Once the stack is
stamped, gently separate the pieces.
6.
Adhere the middle
piece and small piece to their respective mats.
7.
Adhere the small
pair onto the middle pair, making sure that the stamped images line up. I found
that using Adhesive Tape to position them is the best way. Place tape along each of the four edges, then lift a small piece of each strip on two
opposite corners.
8.
This allows you
to position the piece and then press the corners where the adhesive is exposed
to hold it in position. Then pull the backing strips to finish the job.
9.
Adhere the
middle/small pieces to the large piece, and then adhere the whole lot to the
card base. Use the Tape corner technique each time to line
everything up easily.
10. Stamp a sentiment and punch a label and place it in
the middle of the card.
11. Add embellishments as desired.
Here are some other cards that I made, plus the projects made by my Craft Group ladies.
 |
| This is what happens when you DON'T use the Tape technique! |
I made a matching envelope for this one.
 |
| Back |
 |
| Front |
The Craft Group photos
 |
| A card made by Amber |
 |
| ATC made by Kieran |
 |
| ATC made by Amanda |
I made a couple of cards using some extra ATCs
I hope you enjoy using this technique.
Happy crafting!


love these Ellen, I'm full of ideas now Thank you x
ReplyDelete